


︎︎︎ Make A Trim Bin ︎︎︎
let’s ride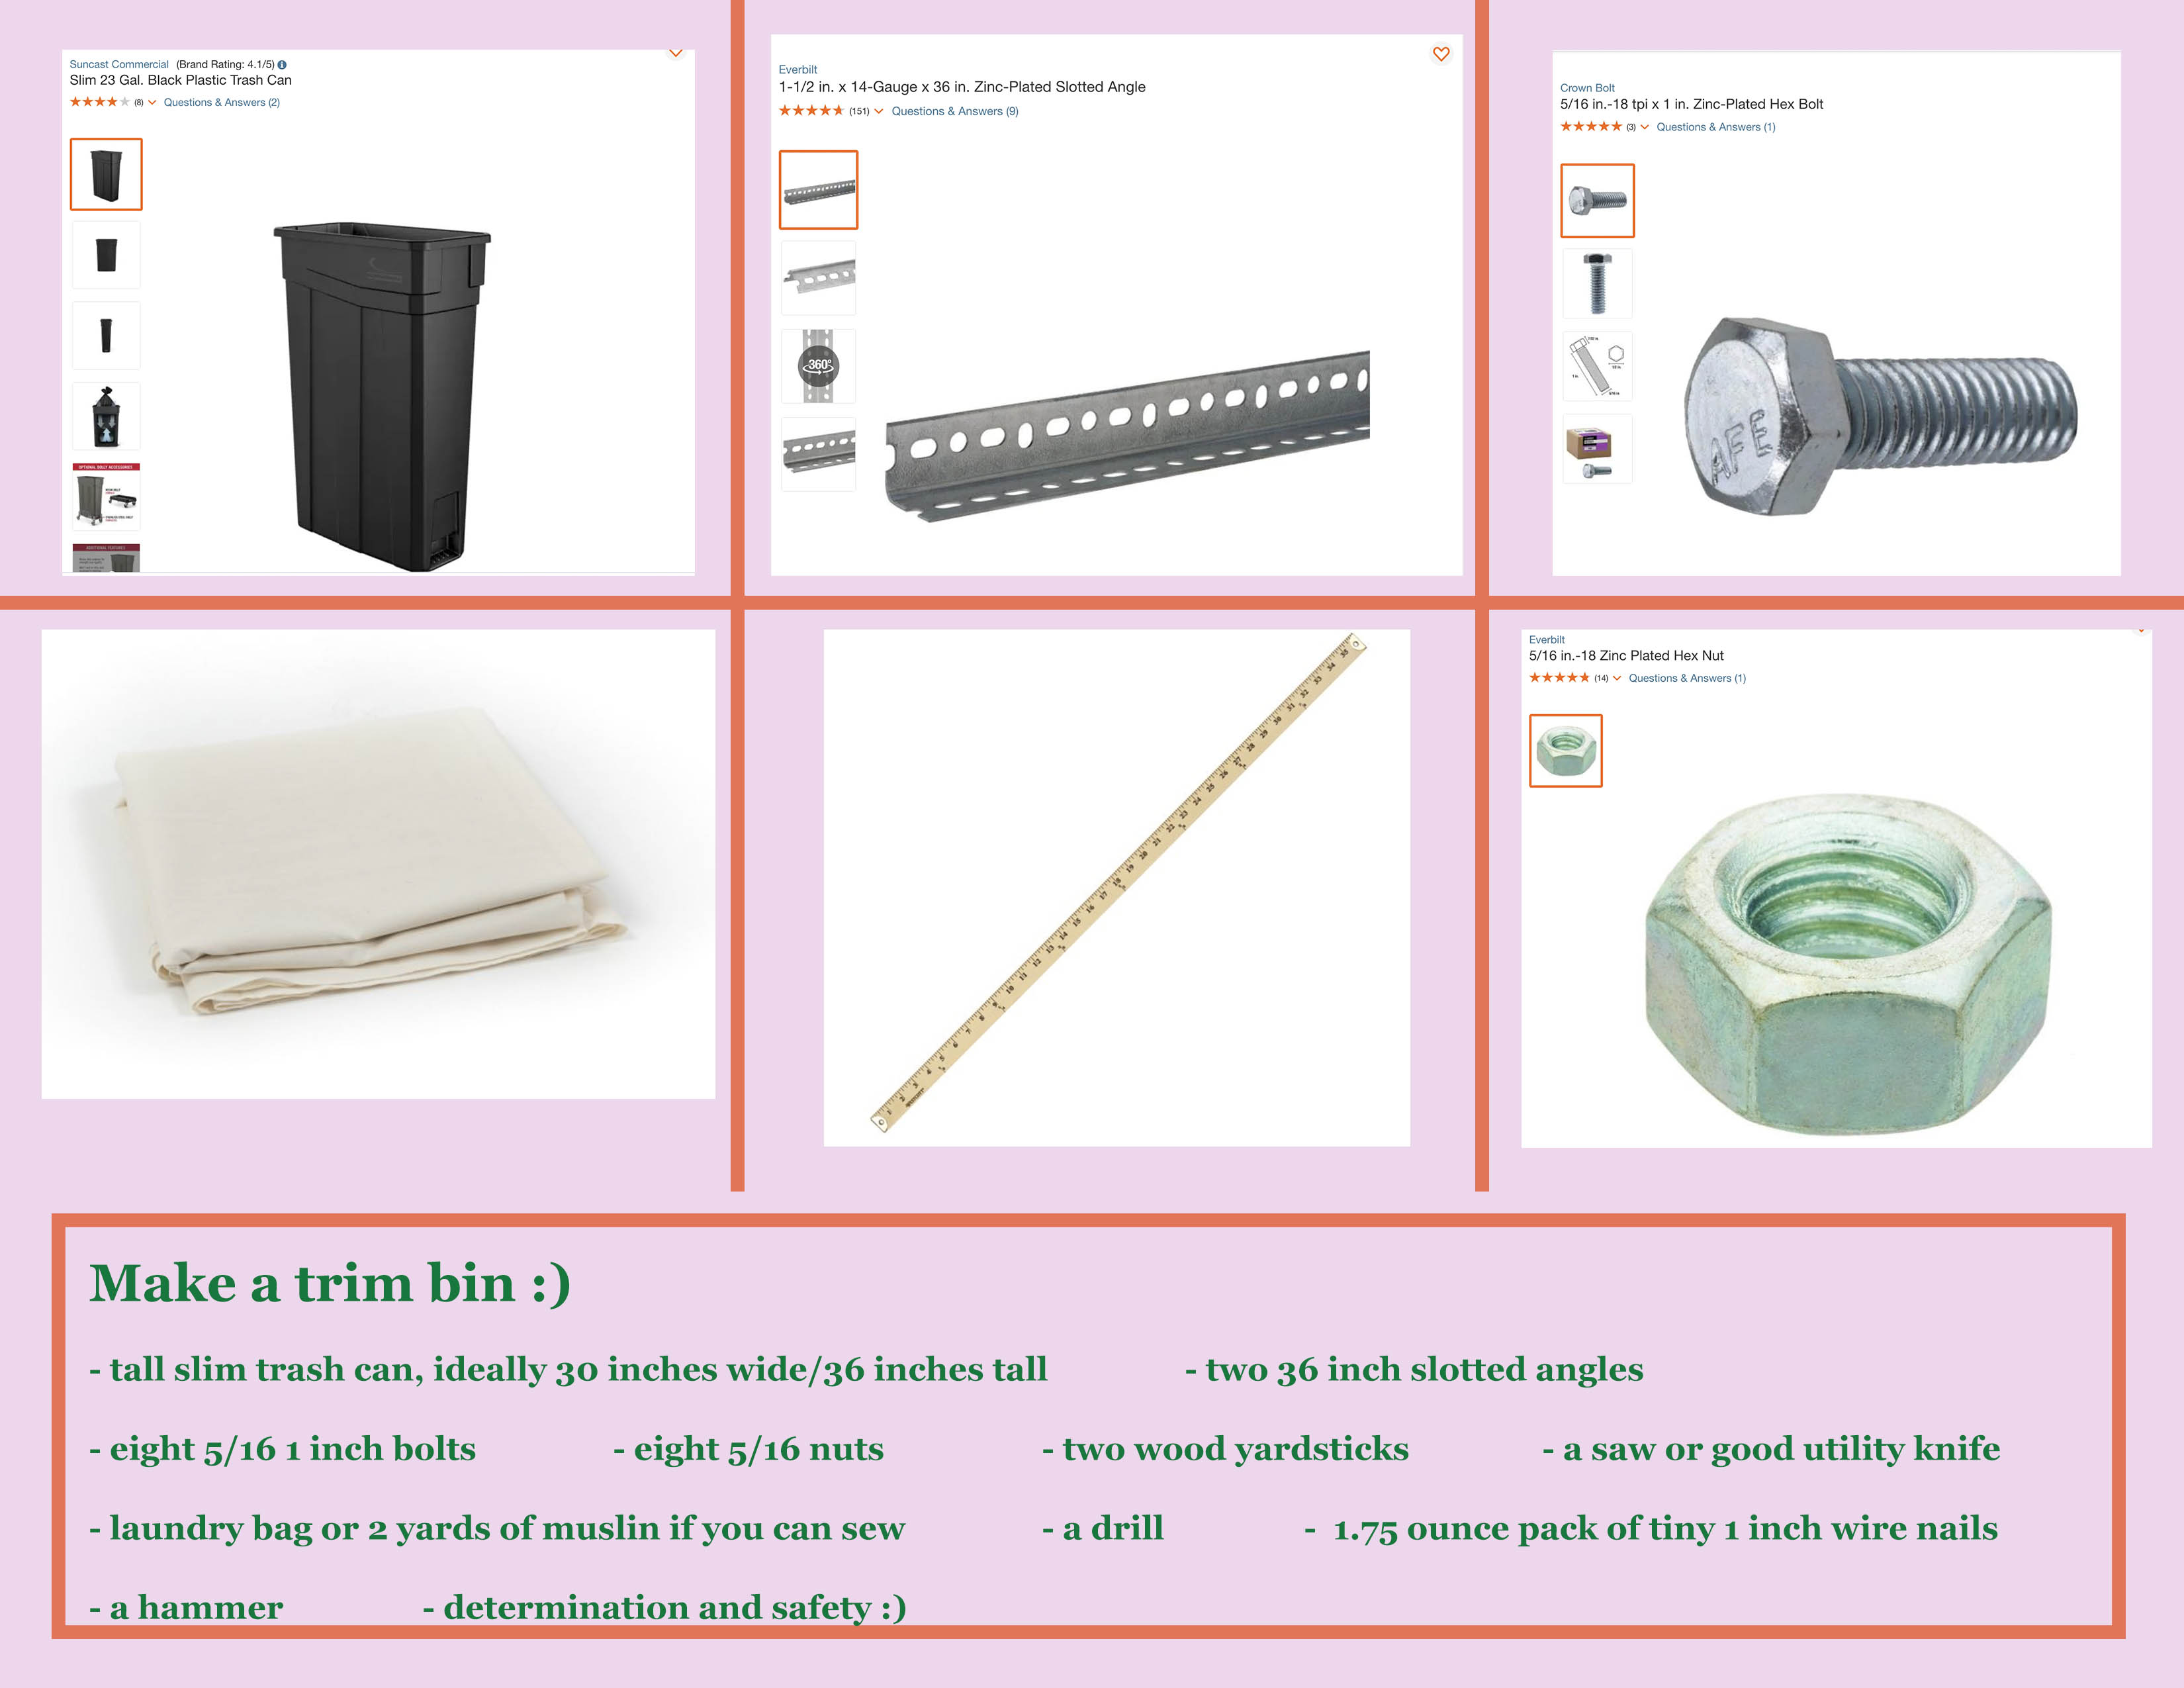
Let’s make a trim bin!
A trim bin is a super helpful and, unfortunately, largely obsolete piece of analog film editing room equipment. It’s an extremely useful object if you are editing reels or handling really any amount of motion picture film - the rack above the trim bin has pegs to safely suspend your cuts by their sprocket holes and allows you to order and label them so that nothing goes missing, and the film bag provides a soft place to toss ends you aren’t using that’s way more forgiving than a trash can or the floor, so that you can dig through accidentally misplaced clips or scavenge unused tails for later projects. Because they are very big and very old and very out of production, they can be nearly impossible to track down as an independent filmmaker, as well as cost-prohibitive. After lots of time agonizing over not being able to find one, I made my own trim bin and so can you!
The reference images I used above are largely pulled from home depot just because it’s a large chain where you can get all of these things. However, I highly encourage you to scout cheaper or second-hand options of these largely generic objects, dumpster-dive, borrow from friends or steal from corporations at your discretion.
YOU WILL NEED:
- a tall slim trash can, ideally 30 inches wide at the mouth and 36 inches or more tall
- two 36 inch zinc-plated slotted angles
- eight 5/16 1 inch bolts
- eight 5/16 nuts
- two wood yardsticks
- a laundry bag or two yards of canvas/muslin (if you can sew)
- a 1.75 ounce pack of tiny 1 inch wire nails
- a saw or good utility knife
- a drill
- a hammer
CONSTRUCTION:
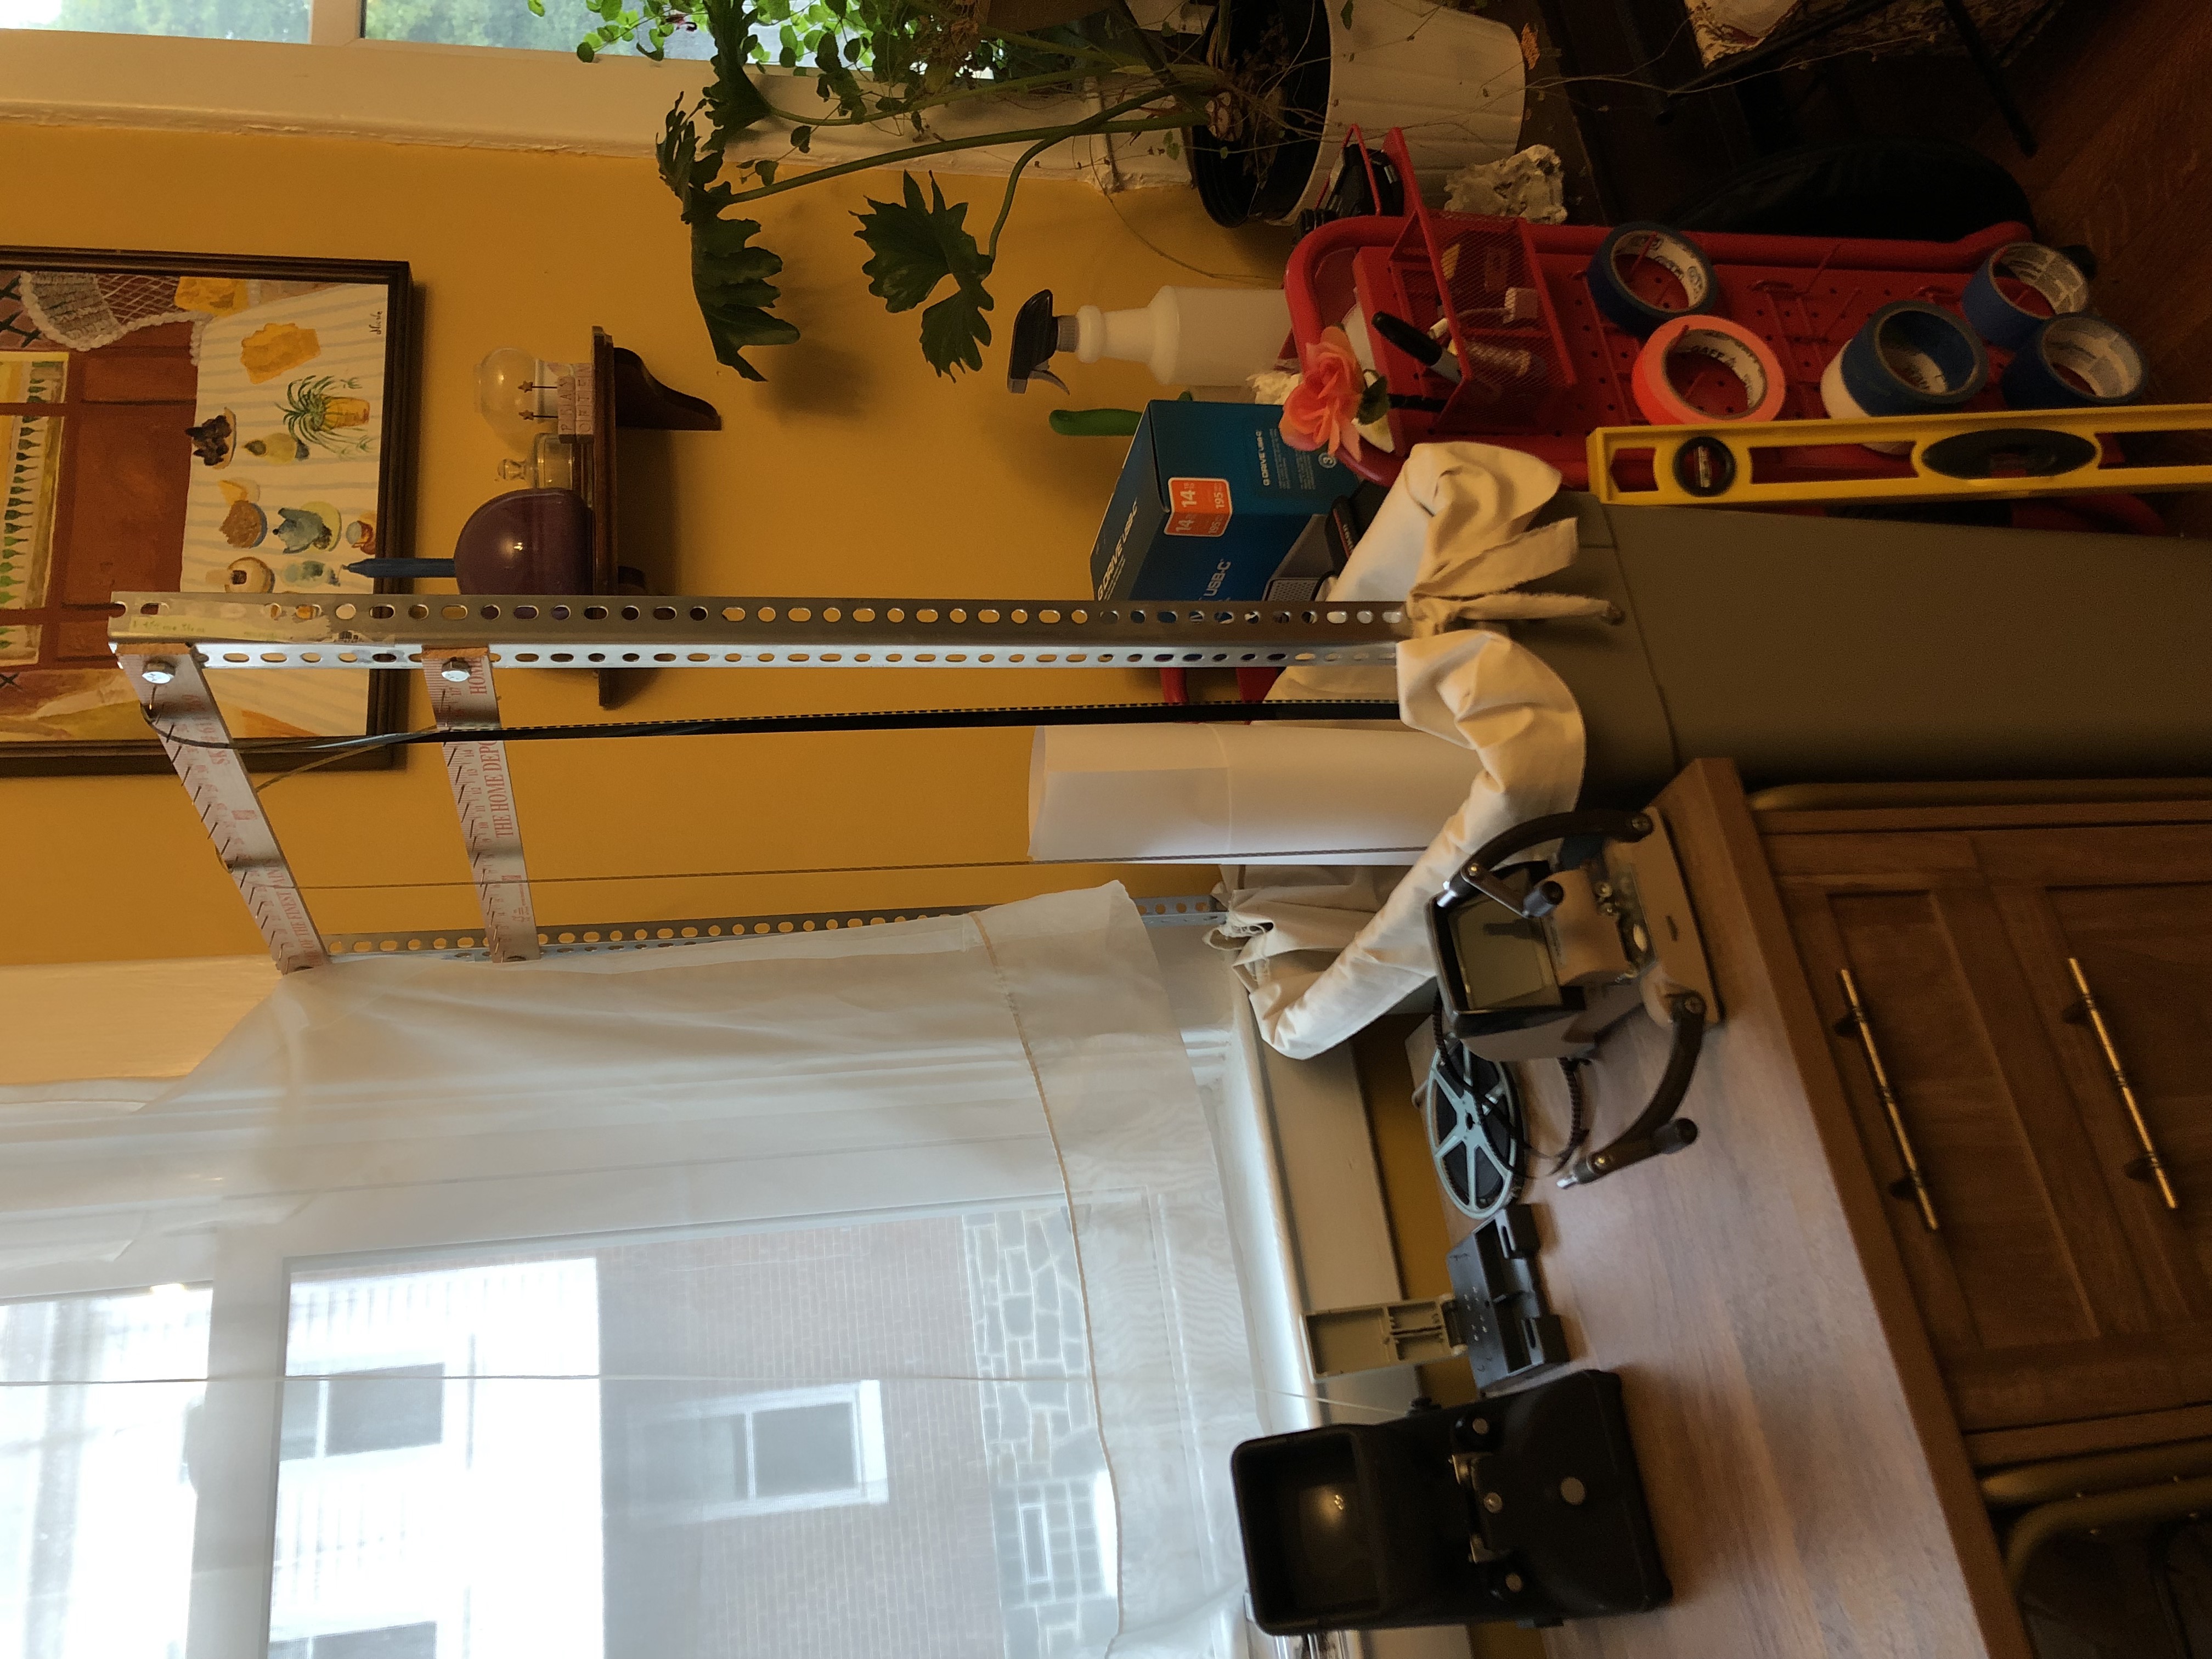
A trim bin is basically a big fabric-lined bin with a film rack attached overtop of it, with enough room for clips to drape, and for you to order them. The slotted angles act as the arms holding up the film rack - make sure they’re facing the same direction, though it doesn’t matter which one. One side of the slotted angles will be bolted against the trash can, and then the yardsticks (your rack) will bolt to their perpendicular side. All of this construction is super straightforward, you only need your drill to make the holes, the screws you can fasten by hand.
Draw a six inch line in the center of the shortest side of your trash can from the lip of the bin straight down on the interior, using a marker or pen. Hold your slotted angle against the inside of the top of the bin along the center line you drew, so that you can see the line through the middle of the holes. Use a pen or marker to outline two of the slots, coloring in where the hole is, a couple inches apart - this is for your bolts. Repeat on the other side and then drill your four pre-marked holes in the center of the short sides of the trashcan, making them large enough for your bolts - my drillbit wasn’t quite big enough for the bolt itself so I kinda stirred it around a little and it filled out. Push your bolts through the holes and attach your angles to the inside of the trashcan at the slots you selected, and fasten them by screwing the nuts tightly on the interior. My trashcan had a little indent a few inches below the lip, and so I rested by angles on that to make it all a little smoother. Make sure your angles are facing the same direction.
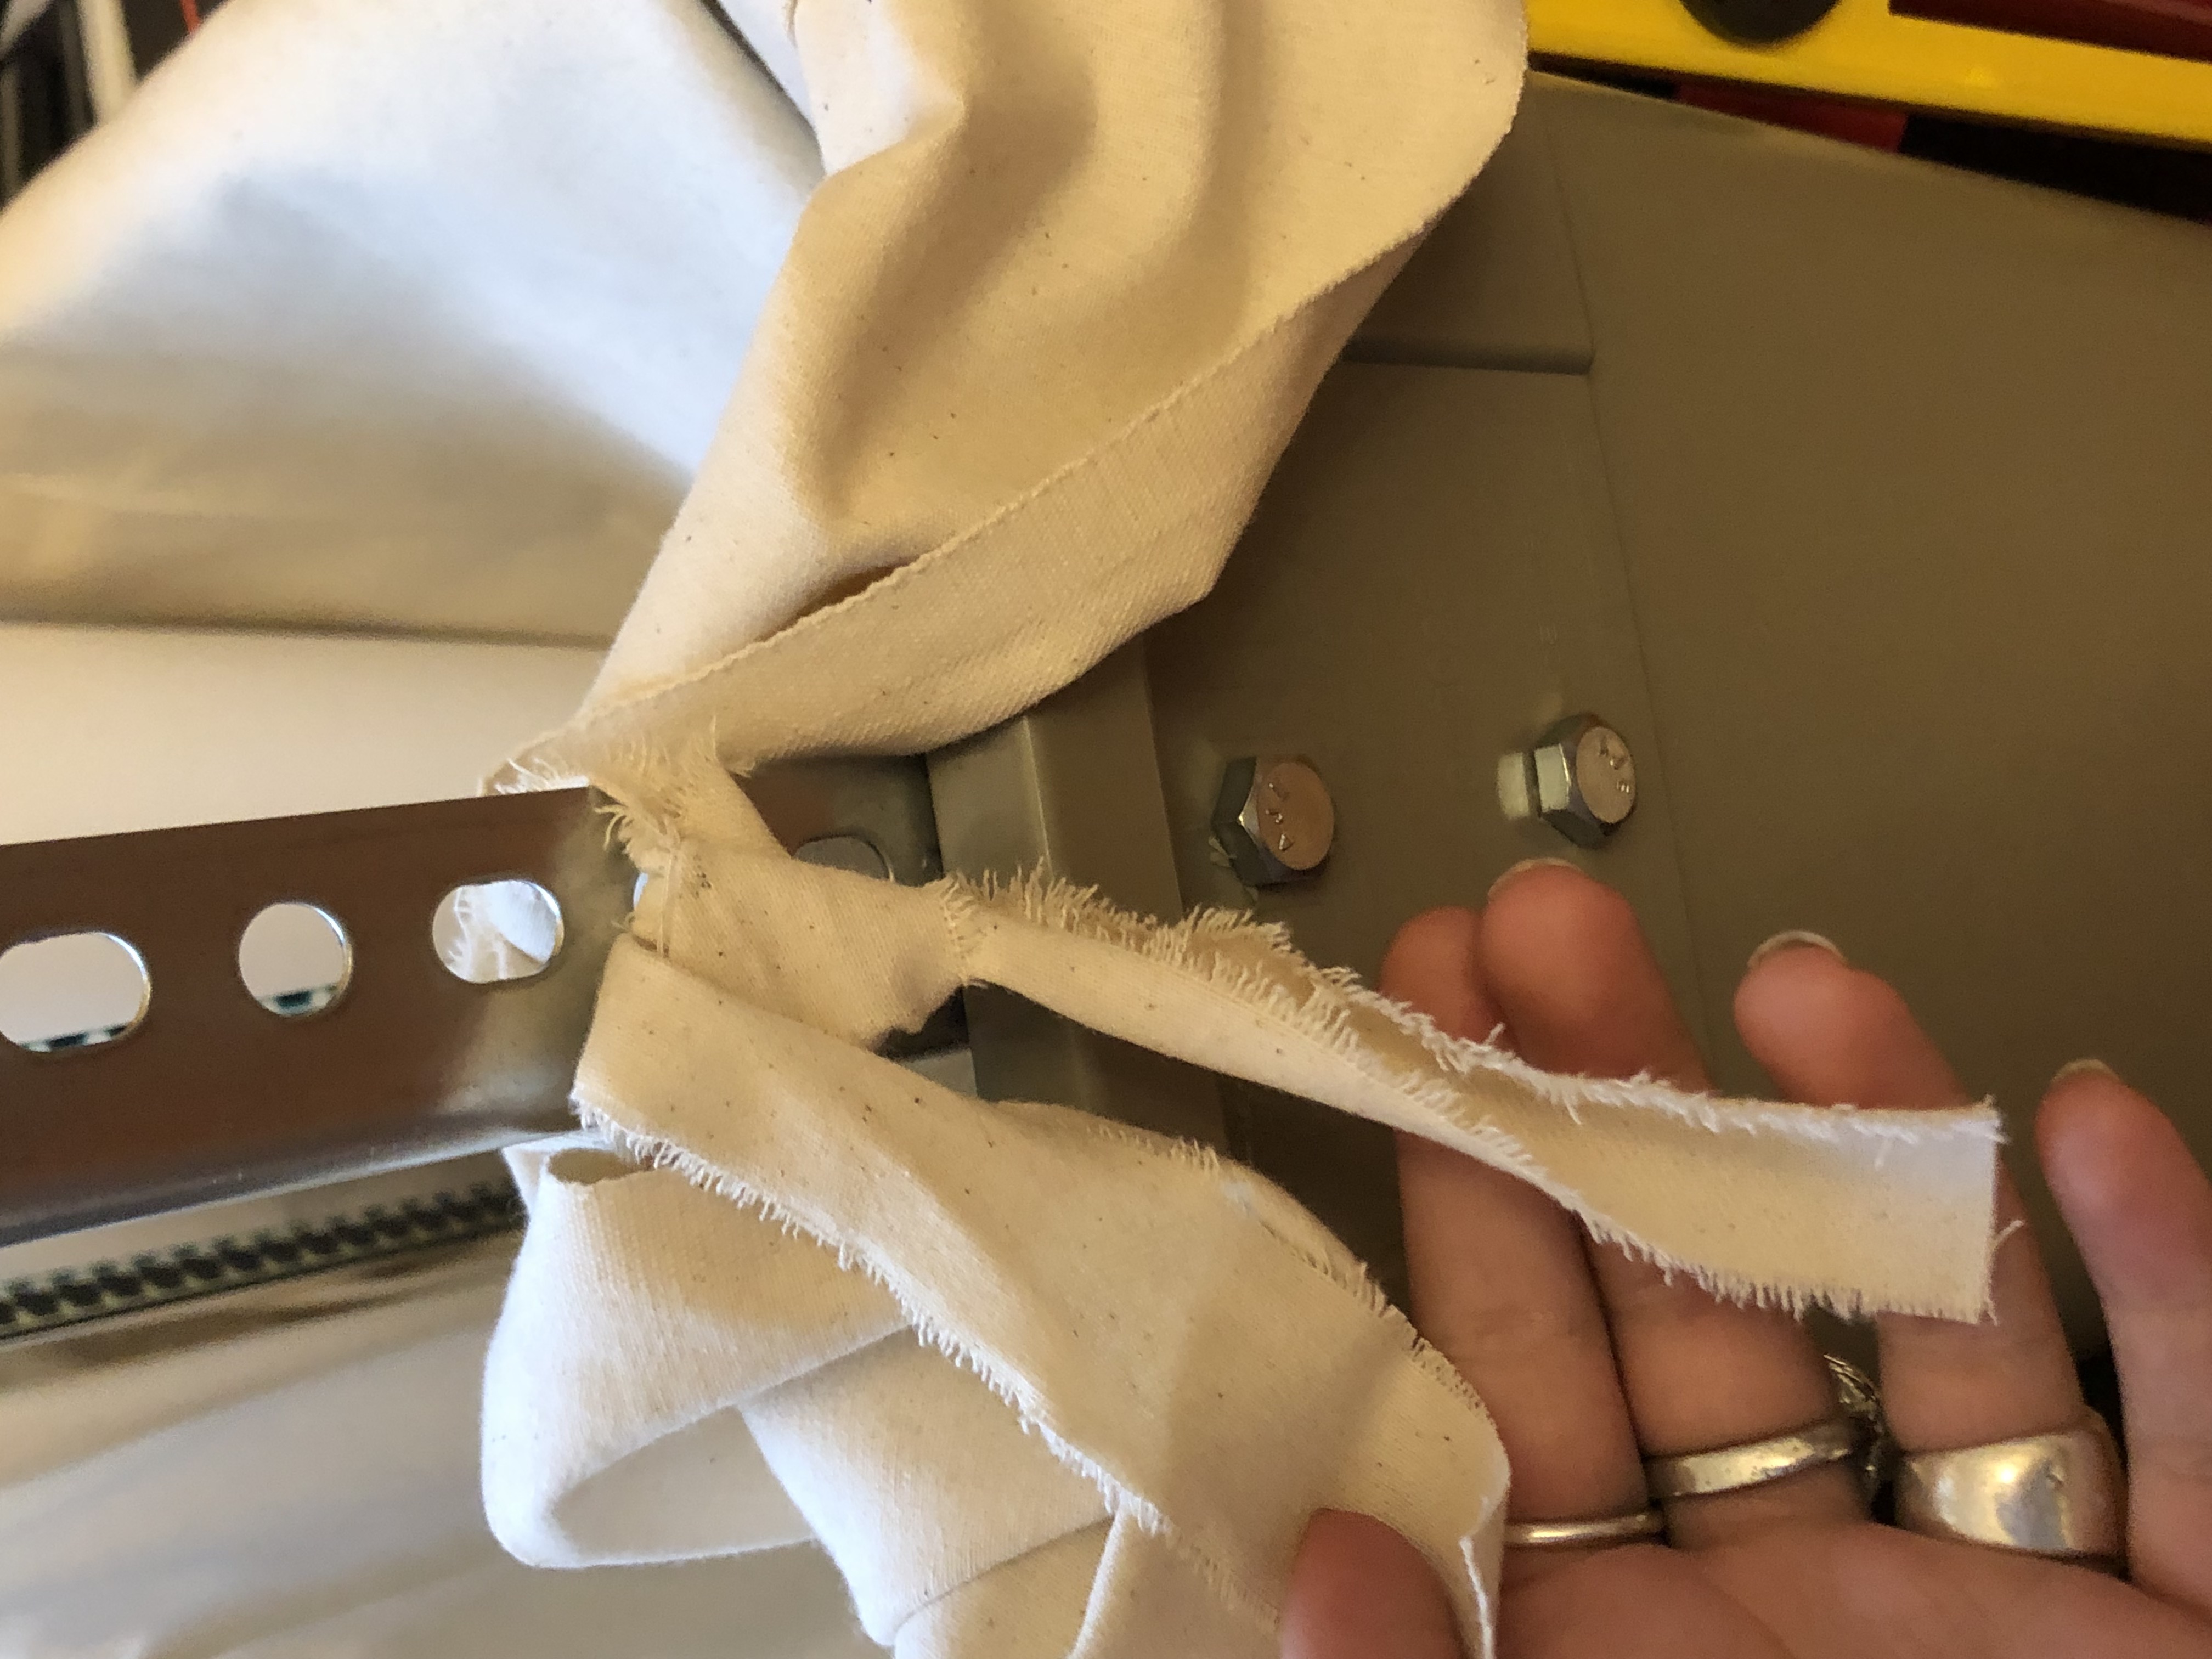
Once your angles are attached firmly, use your yardstick to figure out approxinately how wide your rack can be at the top between them. Mine was a little under 30 inches. It’s likely the top yardstick will be a little longer than the one below it, because the angles can screw to your bin in a way that leans slightly outward, as the sides of it do - check this carefully before cutting your second yardstick to size to avoid any errors. Hold up your yardstick and estimate about what length will keep your two angles straight and stable with it bolted in between, and mark where to cut the excess length with a pen or marker. You will be bolting your yardstick to the opposite edge of your angle than the one you attached to the trashcan - the flat side of the L shape that aligns with your trash can’s widest edge. I cut mine to size by holding the end of my yardstick flush against the end of one angle and using my pen to outline the two slots on either end of the two angles that would hold it in place, and marking a place to cut where it met the end of the opposite side. You can also keep your whole yardstick for a larger rack by drilling it so your bolts are in the middle and the ends stick out on either side! Up to you.
Use your saw to carefully cut the excess yardstick, or score on both sides with a sturdy and sharp utility knife and carefully break off the end you don’t need, using the knife to lean off any splinters afterwards. Use your drill to make holes in the two places where you marked the slots of your angle. Do this on both yardsticks.
Before bolting to your rack, take a hammer and tap your wire nails at even intervals of your choosing along your yardstick, all the way through so that the pointy ends stick out the opposite side. Tap the pointy ends with your hammer to angle them upwards after they’re in, so that they hold your film easier without it slipping off. Make sure you’re gentle so that you dont split the wood, and that you get thin enough nails to poke harmlessly through the sprockets of your film without tearing it - test them on a film strip to make sure they’re the right ones. I put mine at 1.5 inch intervals because I work on small format and so I’m not worried about a neighboring nail scratching up a frame. If you work on 35mm, maybe further apart!
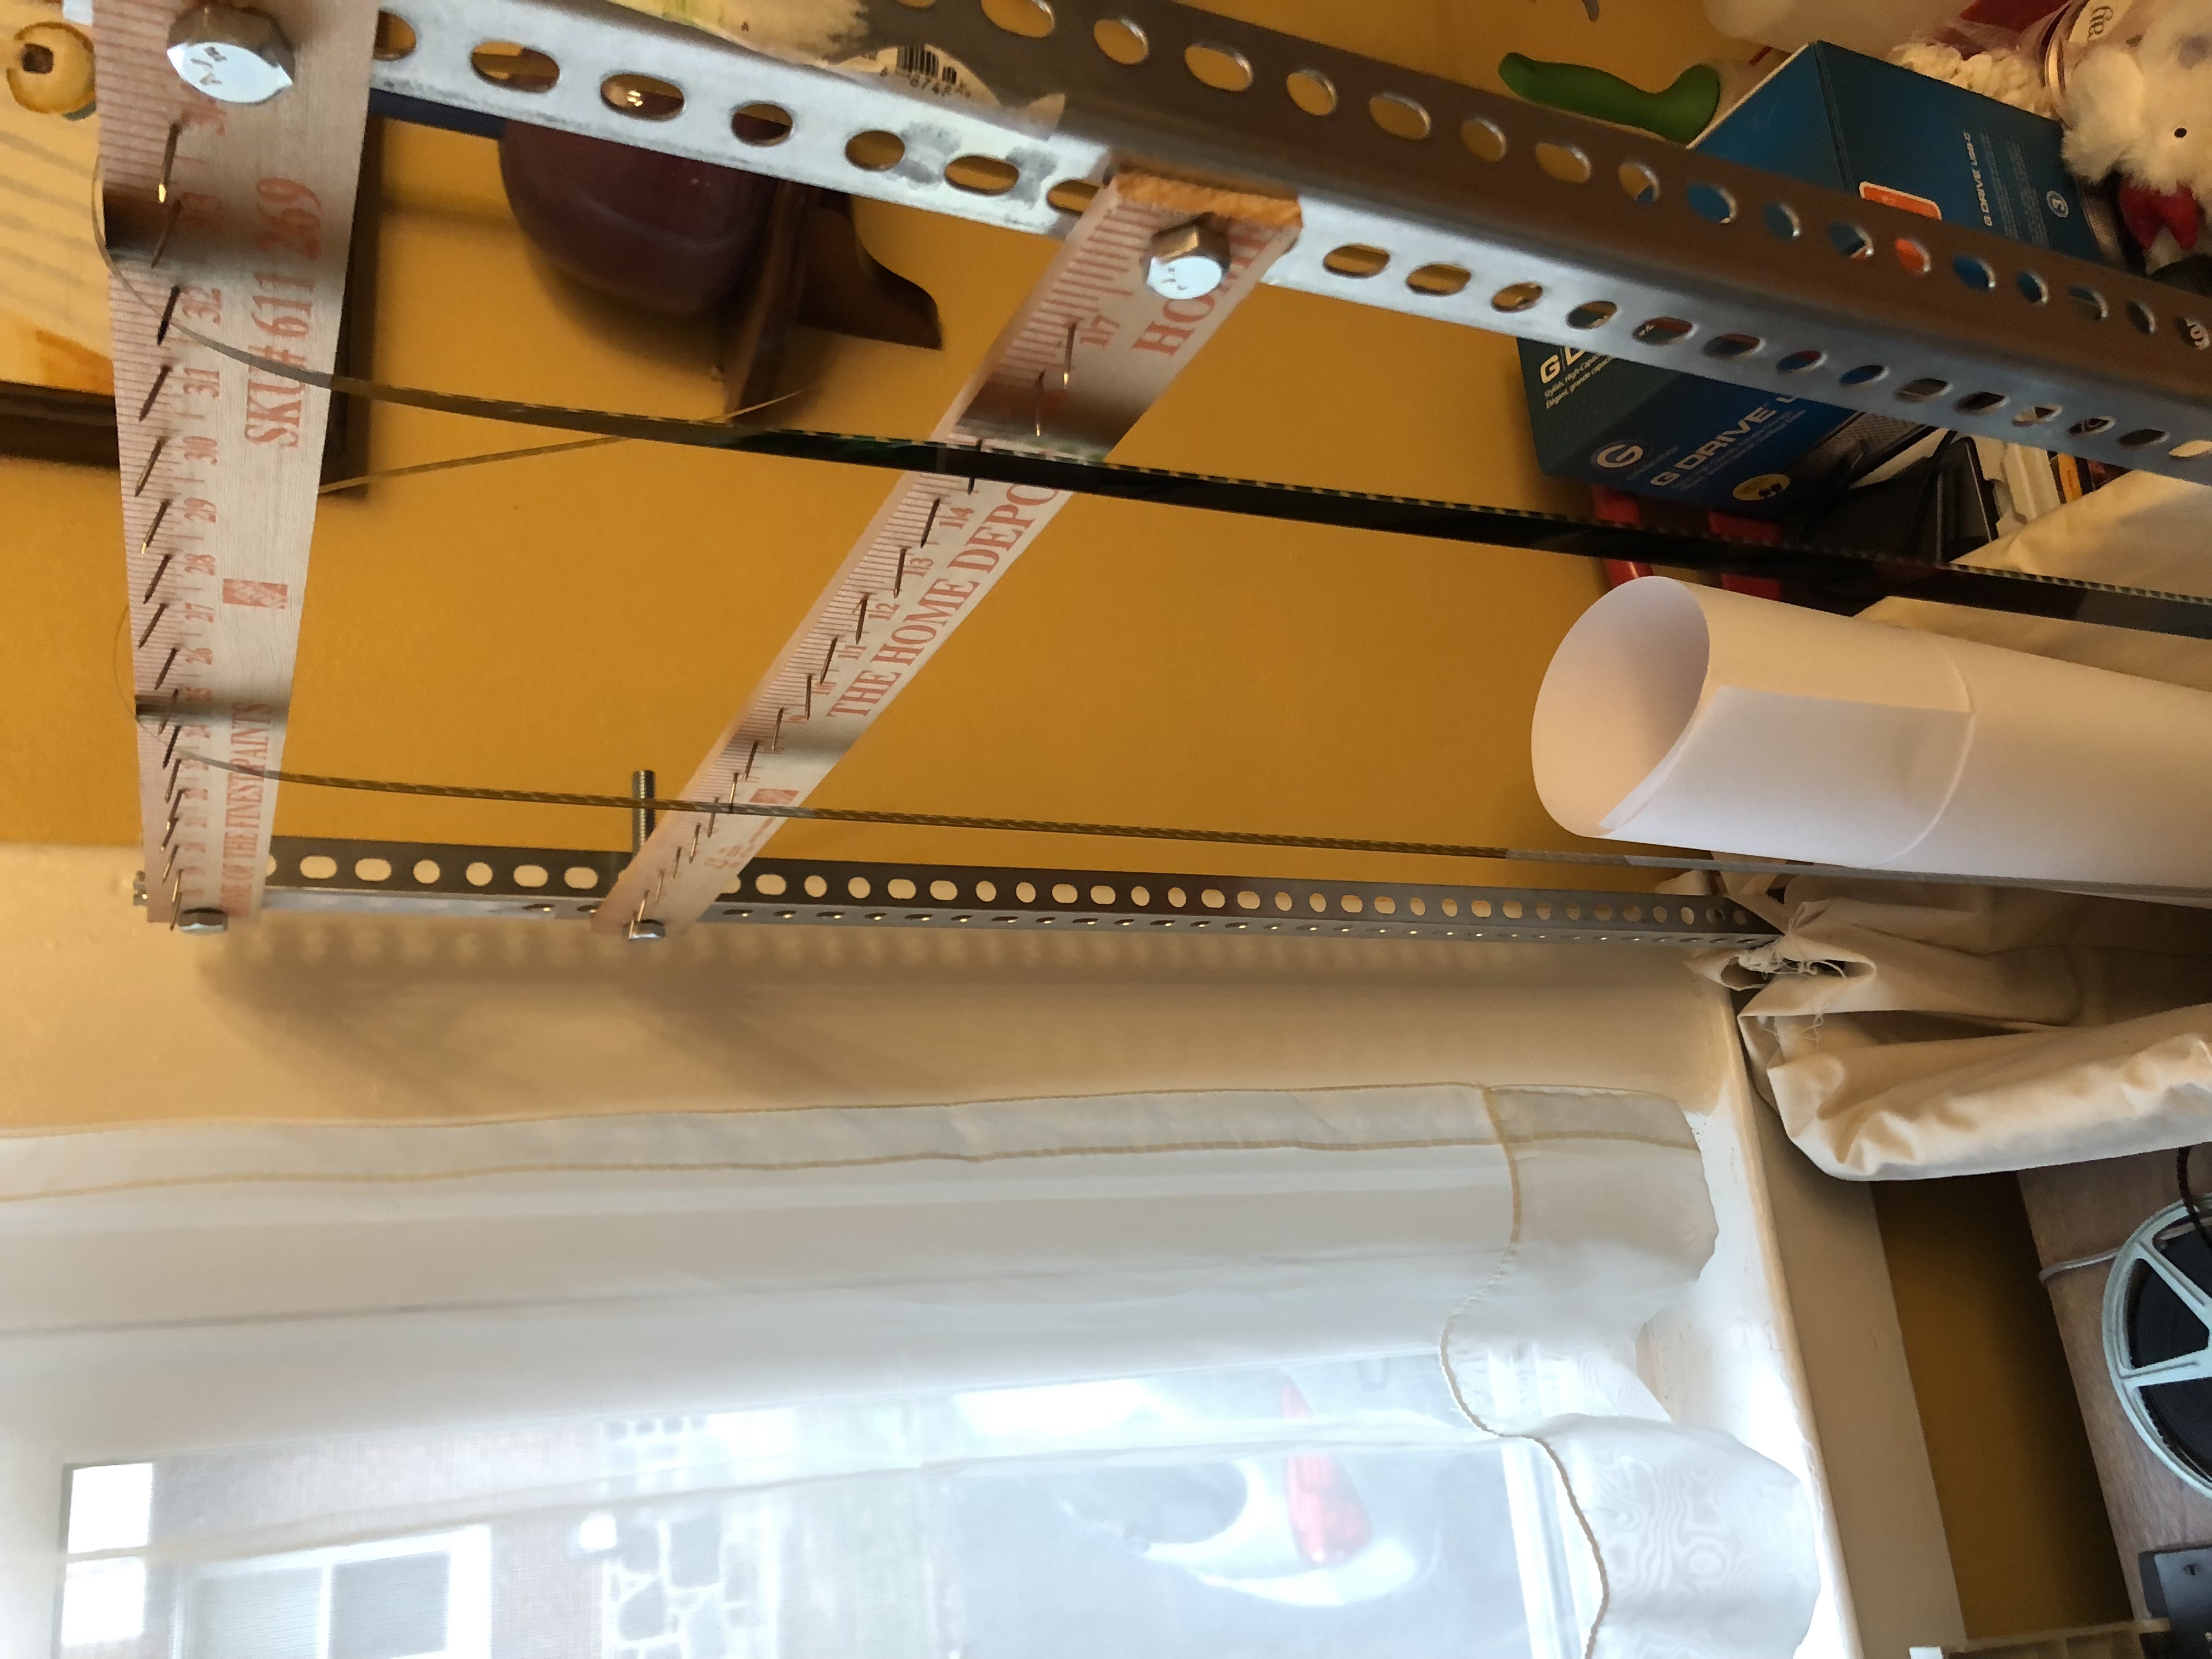
After you’ve added your nails as pegs, push a bolt through the holes you drilled at the ends of your yardstick at the top of your rack, and through the slot in your angle. Fasten with a nut. Place your second yardstick a few slots lower so that they’re about 3 or more inches apart. The second row is optional, but the more room the better. Tighten everything up, fasten your bag to the slotted angles at the ends, and you’re done!
︎︎︎Make a Film Scratching Station︎︎︎
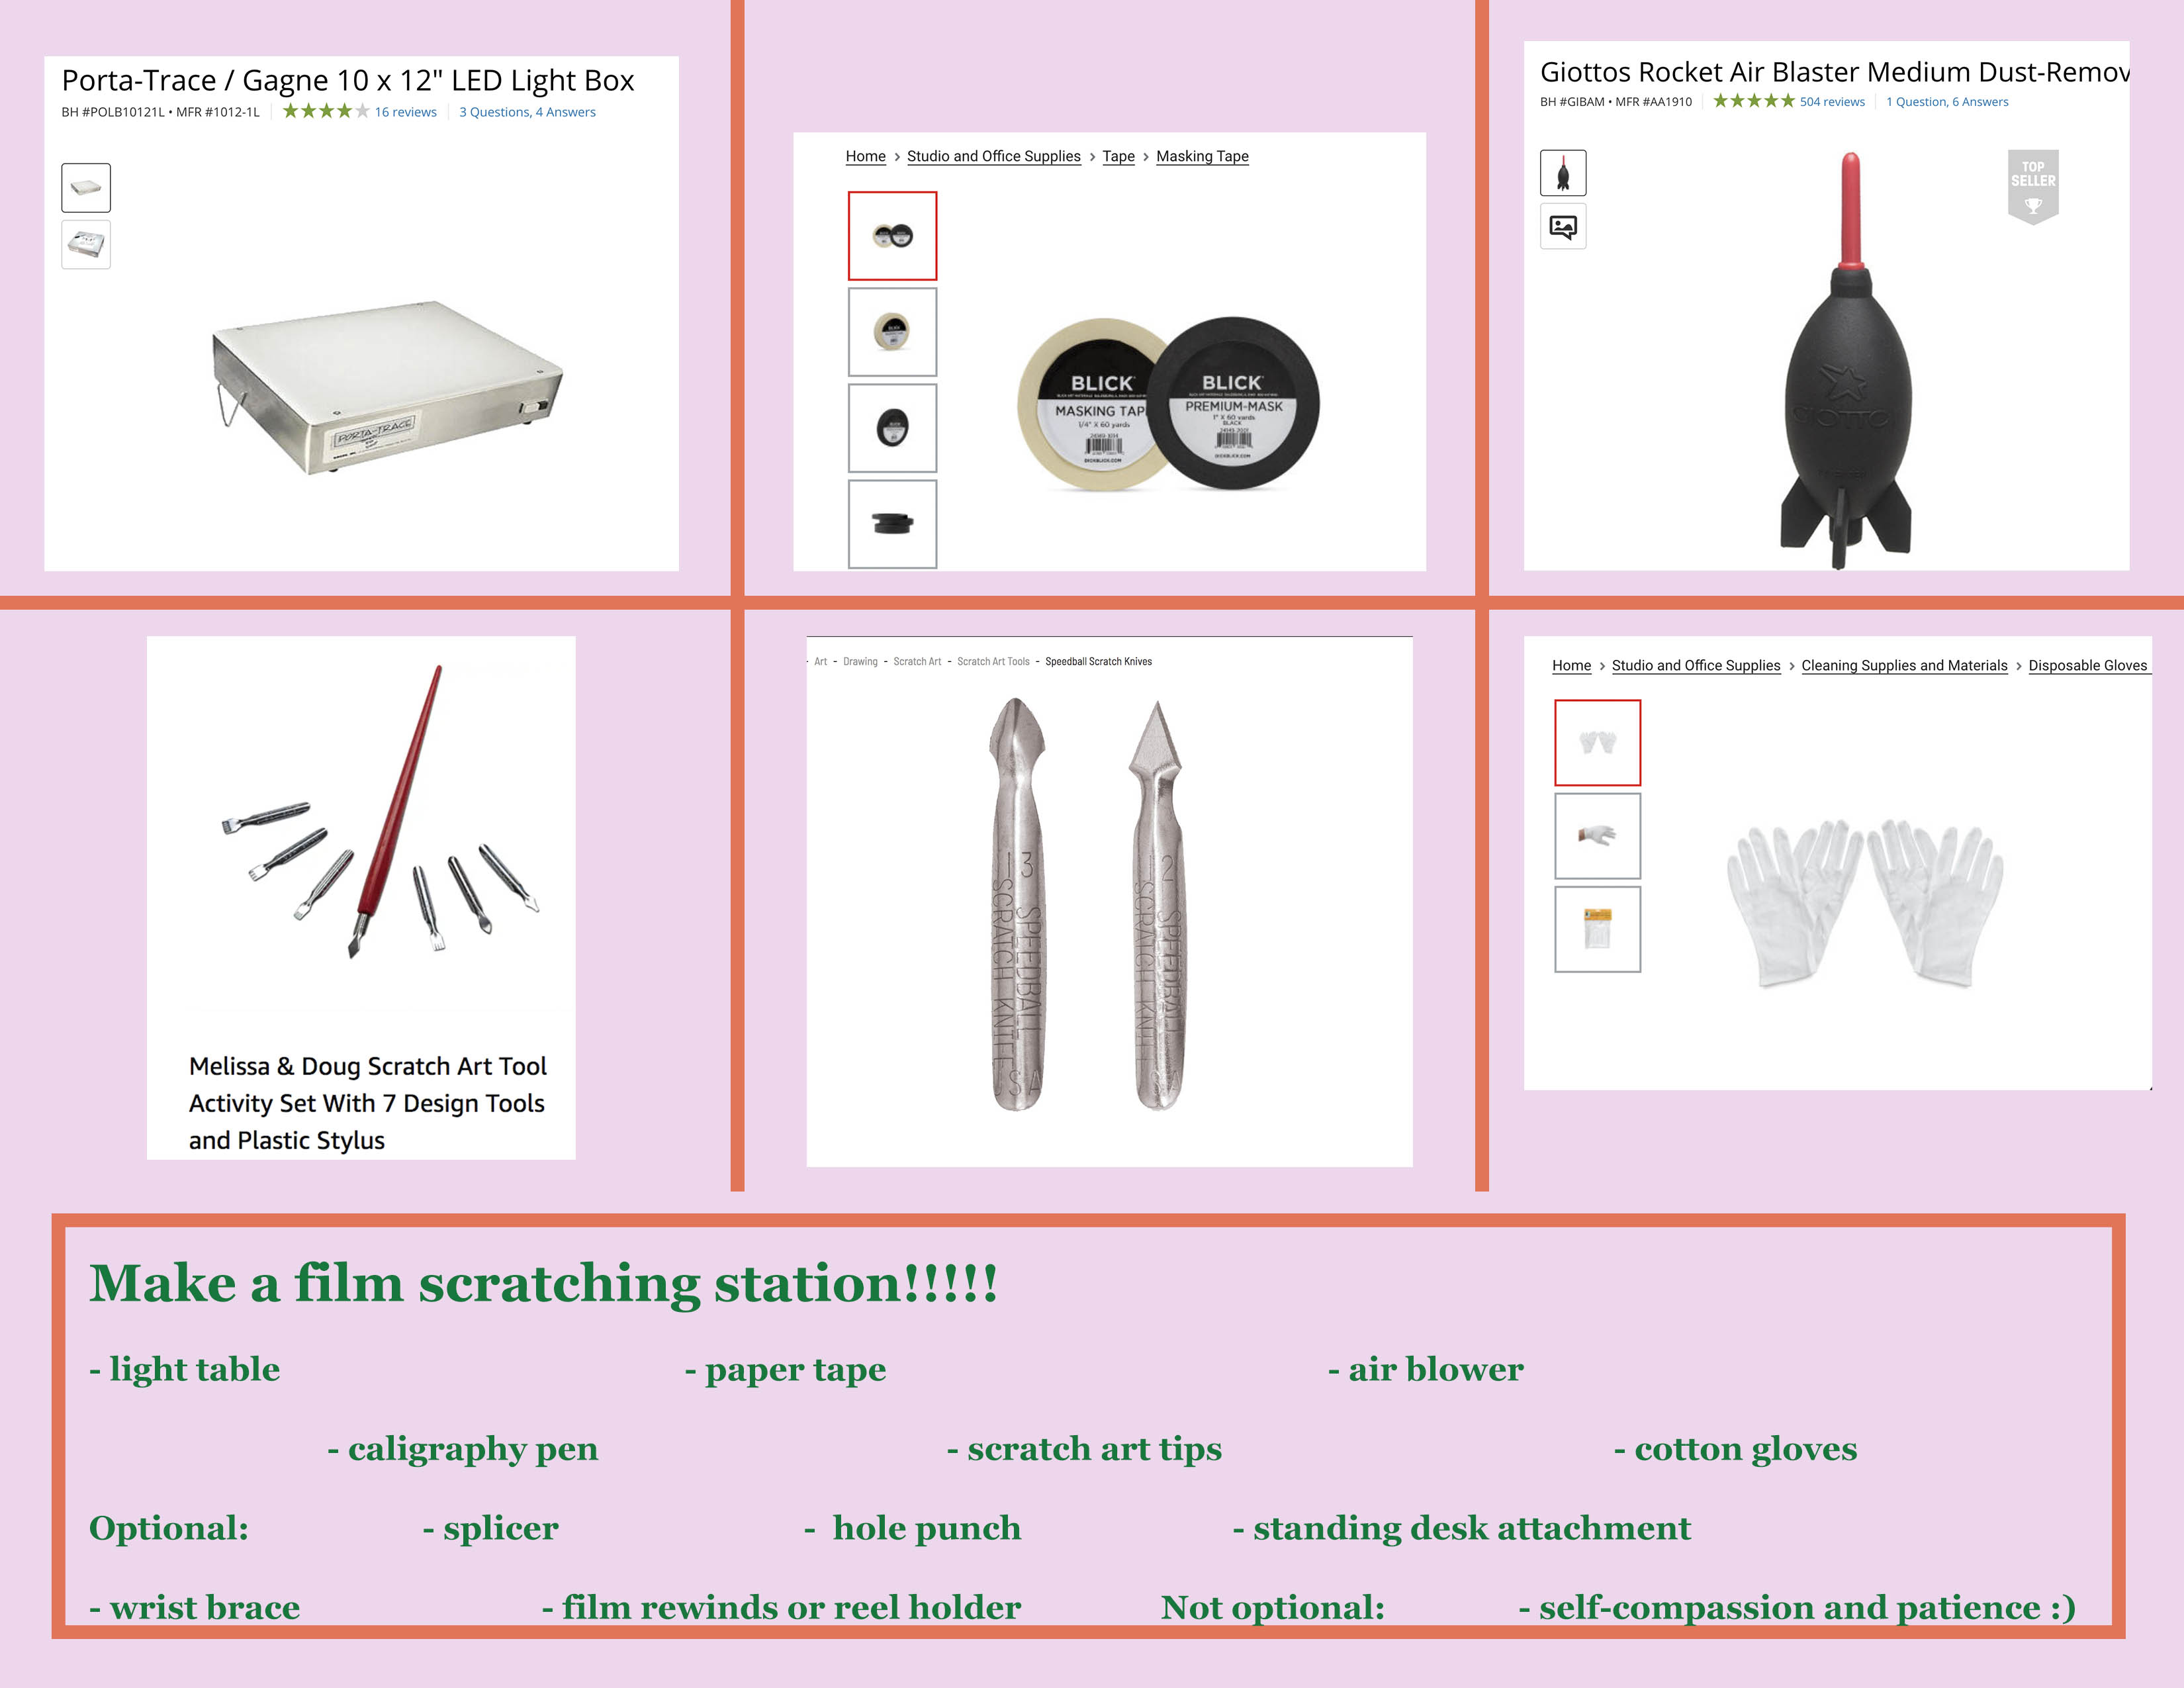
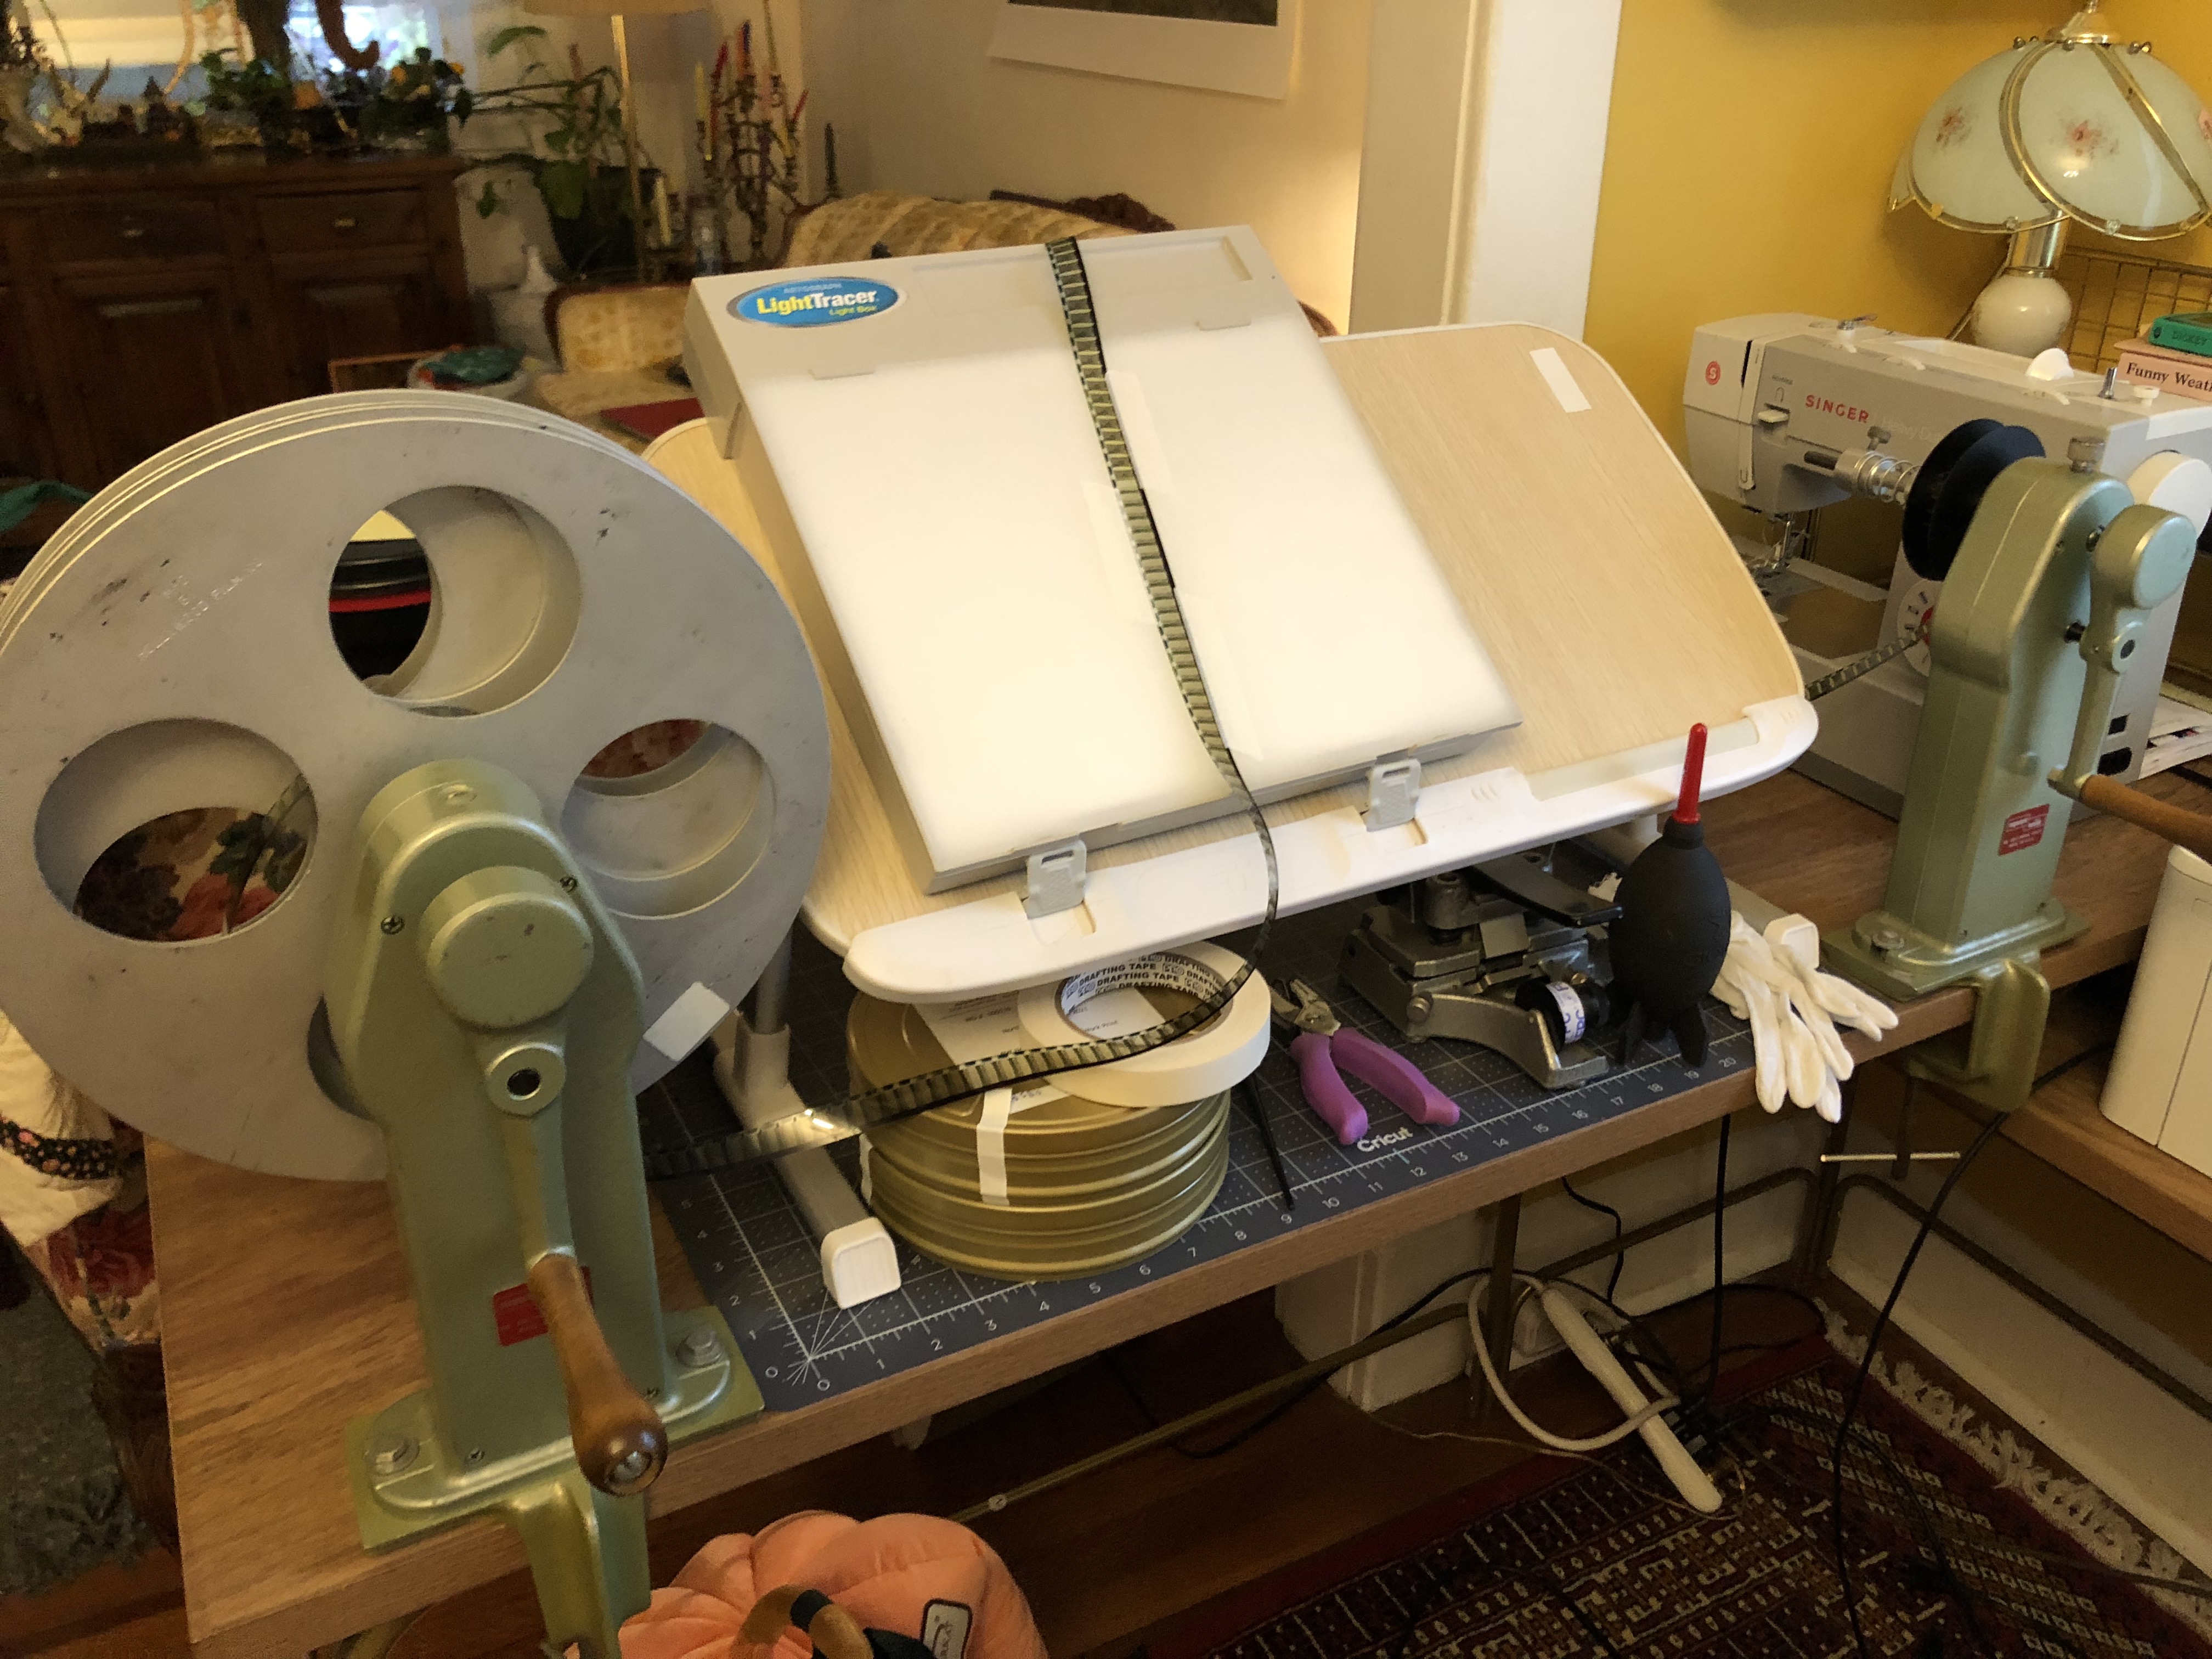
Hello! Here you will find some of the things I use to animate directly on film by scratching emulsion out of the image. I often do this to film that I have shot, developed, and ordered a print of, so that I can alter the live-action footage I took by interfering with the image in ways that would be impossible to do with a camera. I am, personally, interested in interacting with erasure and loss on my film. Instead of leaving you to decipher from a million forums how to get started, here is an exact breakdown of what I use to make my films.
Any of these materials I encourage you to get as cheaply as possible or for free. The images I used are just generic graphics. I’m pretty sure I got my light table for $20 from Michaels 3 years ago, and it works for me fine. There are ways to make your own. Don’t be fooled by fancy.
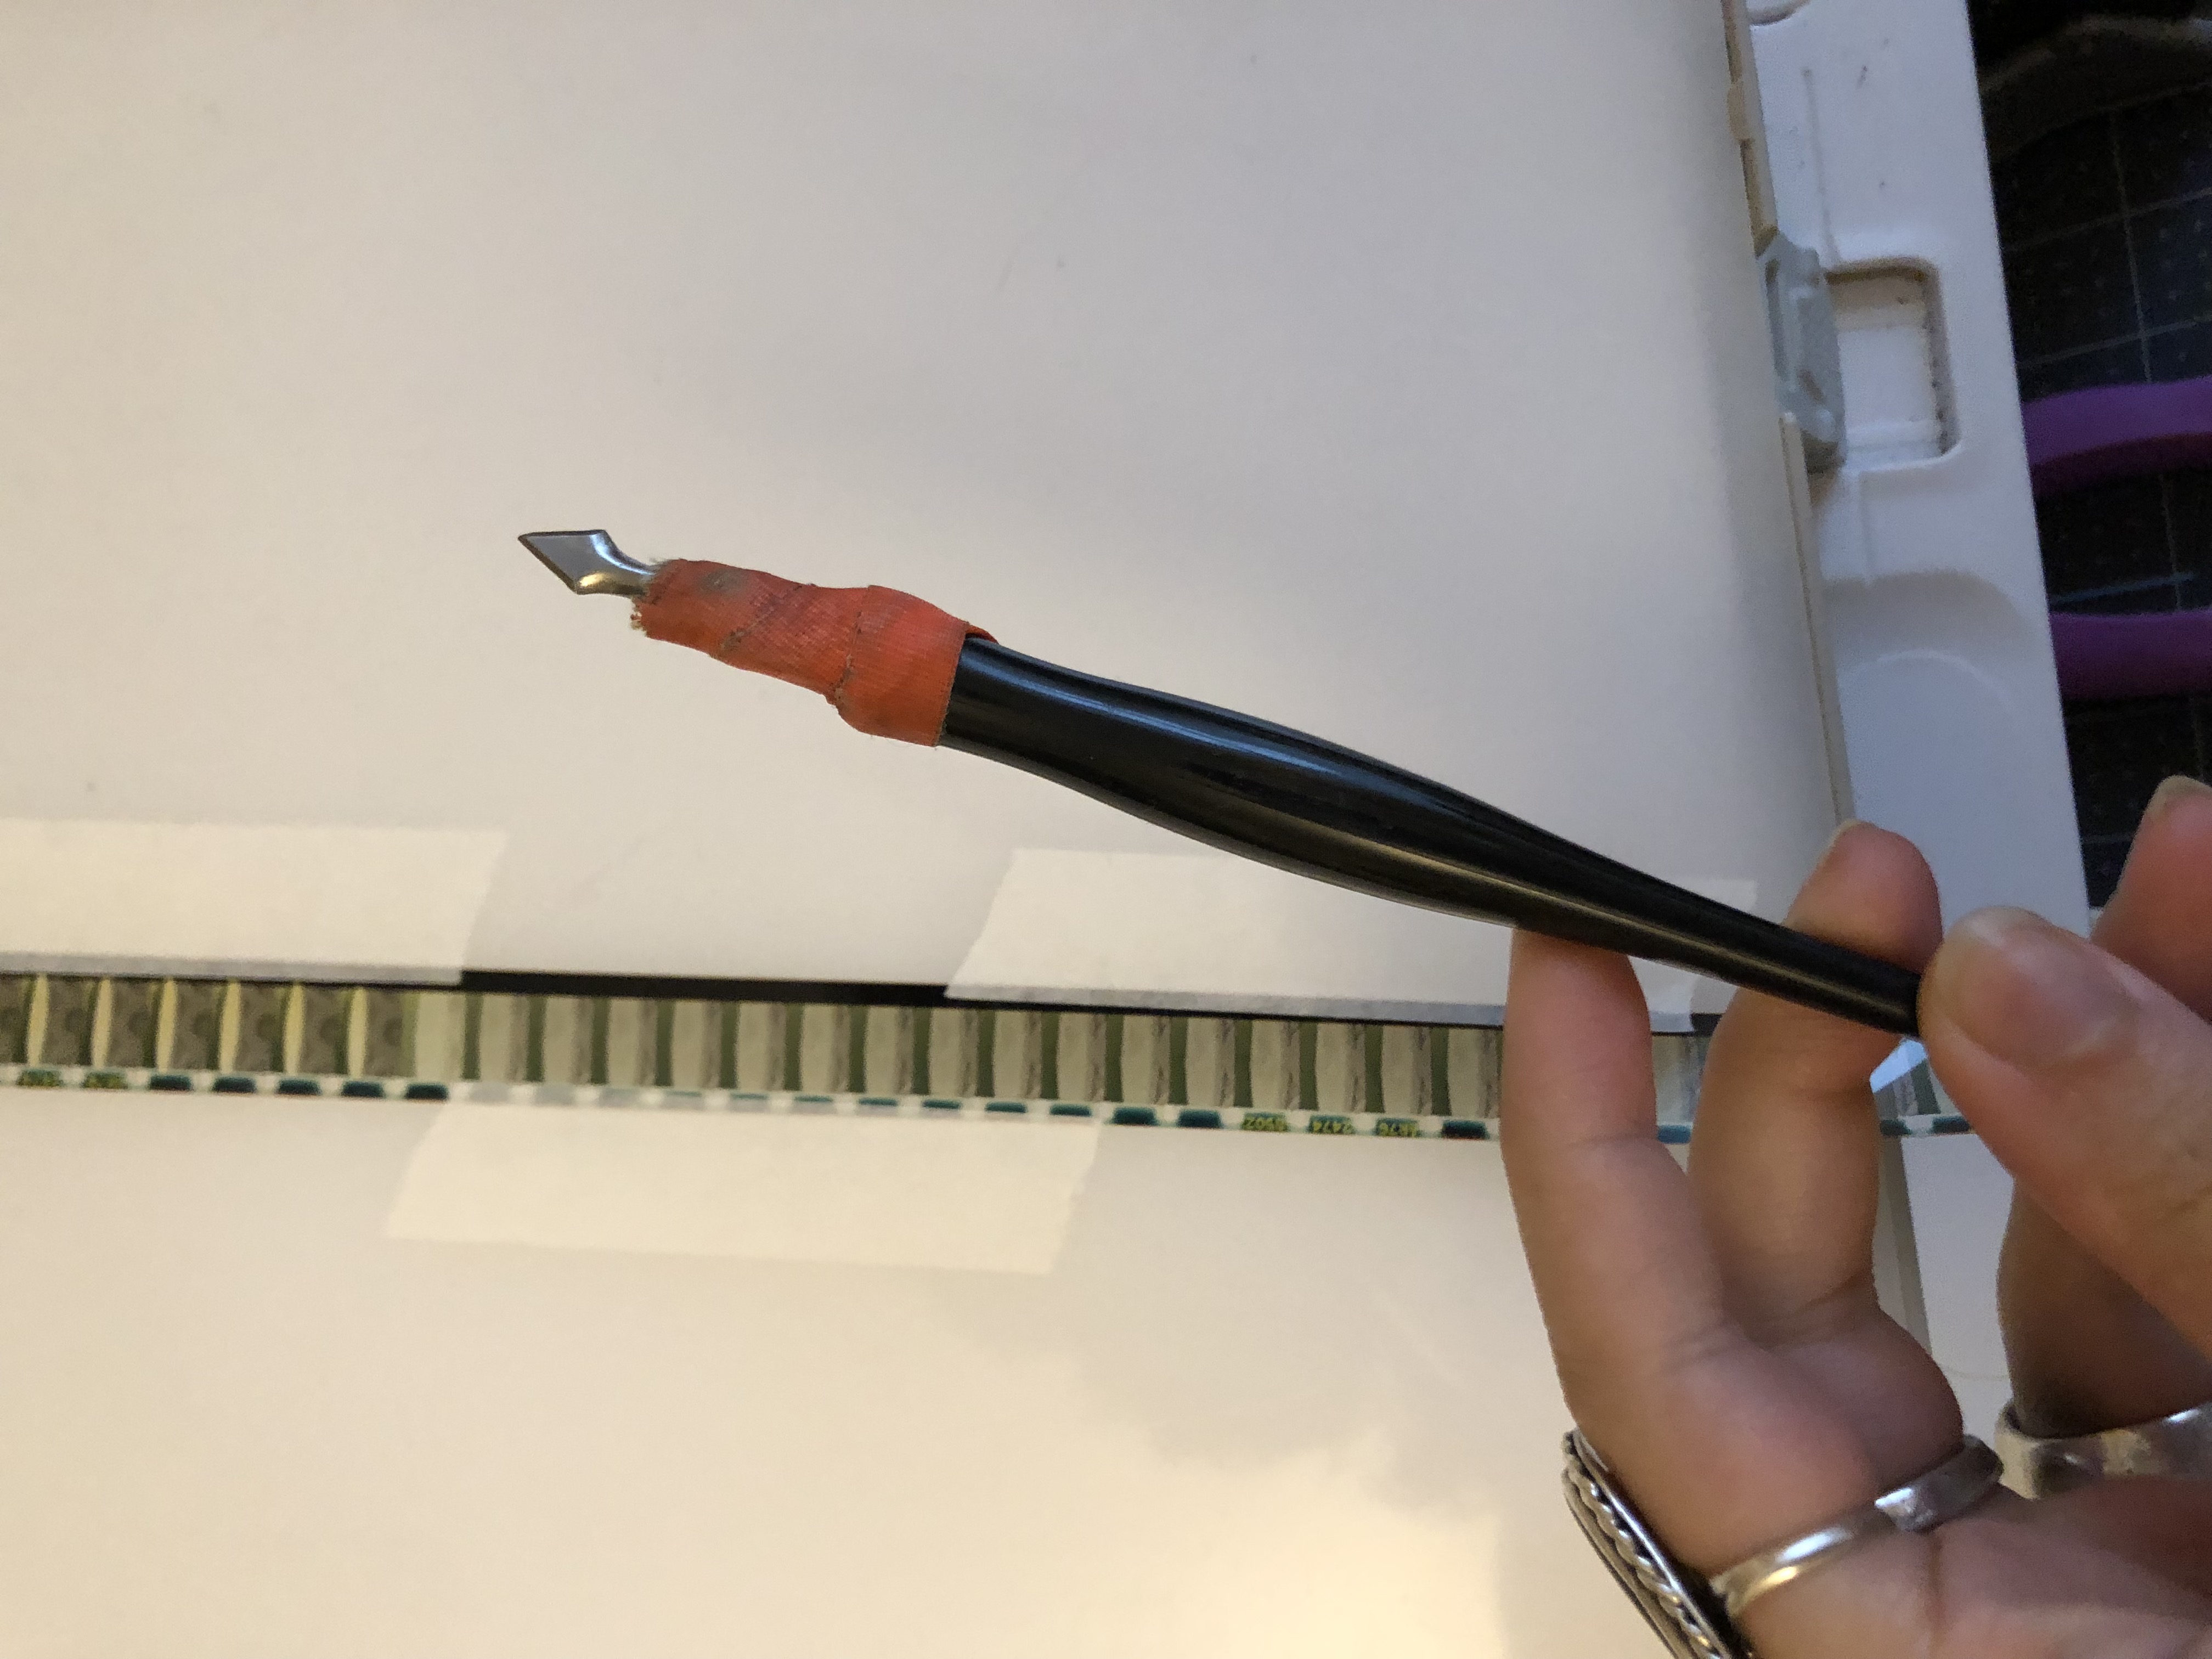
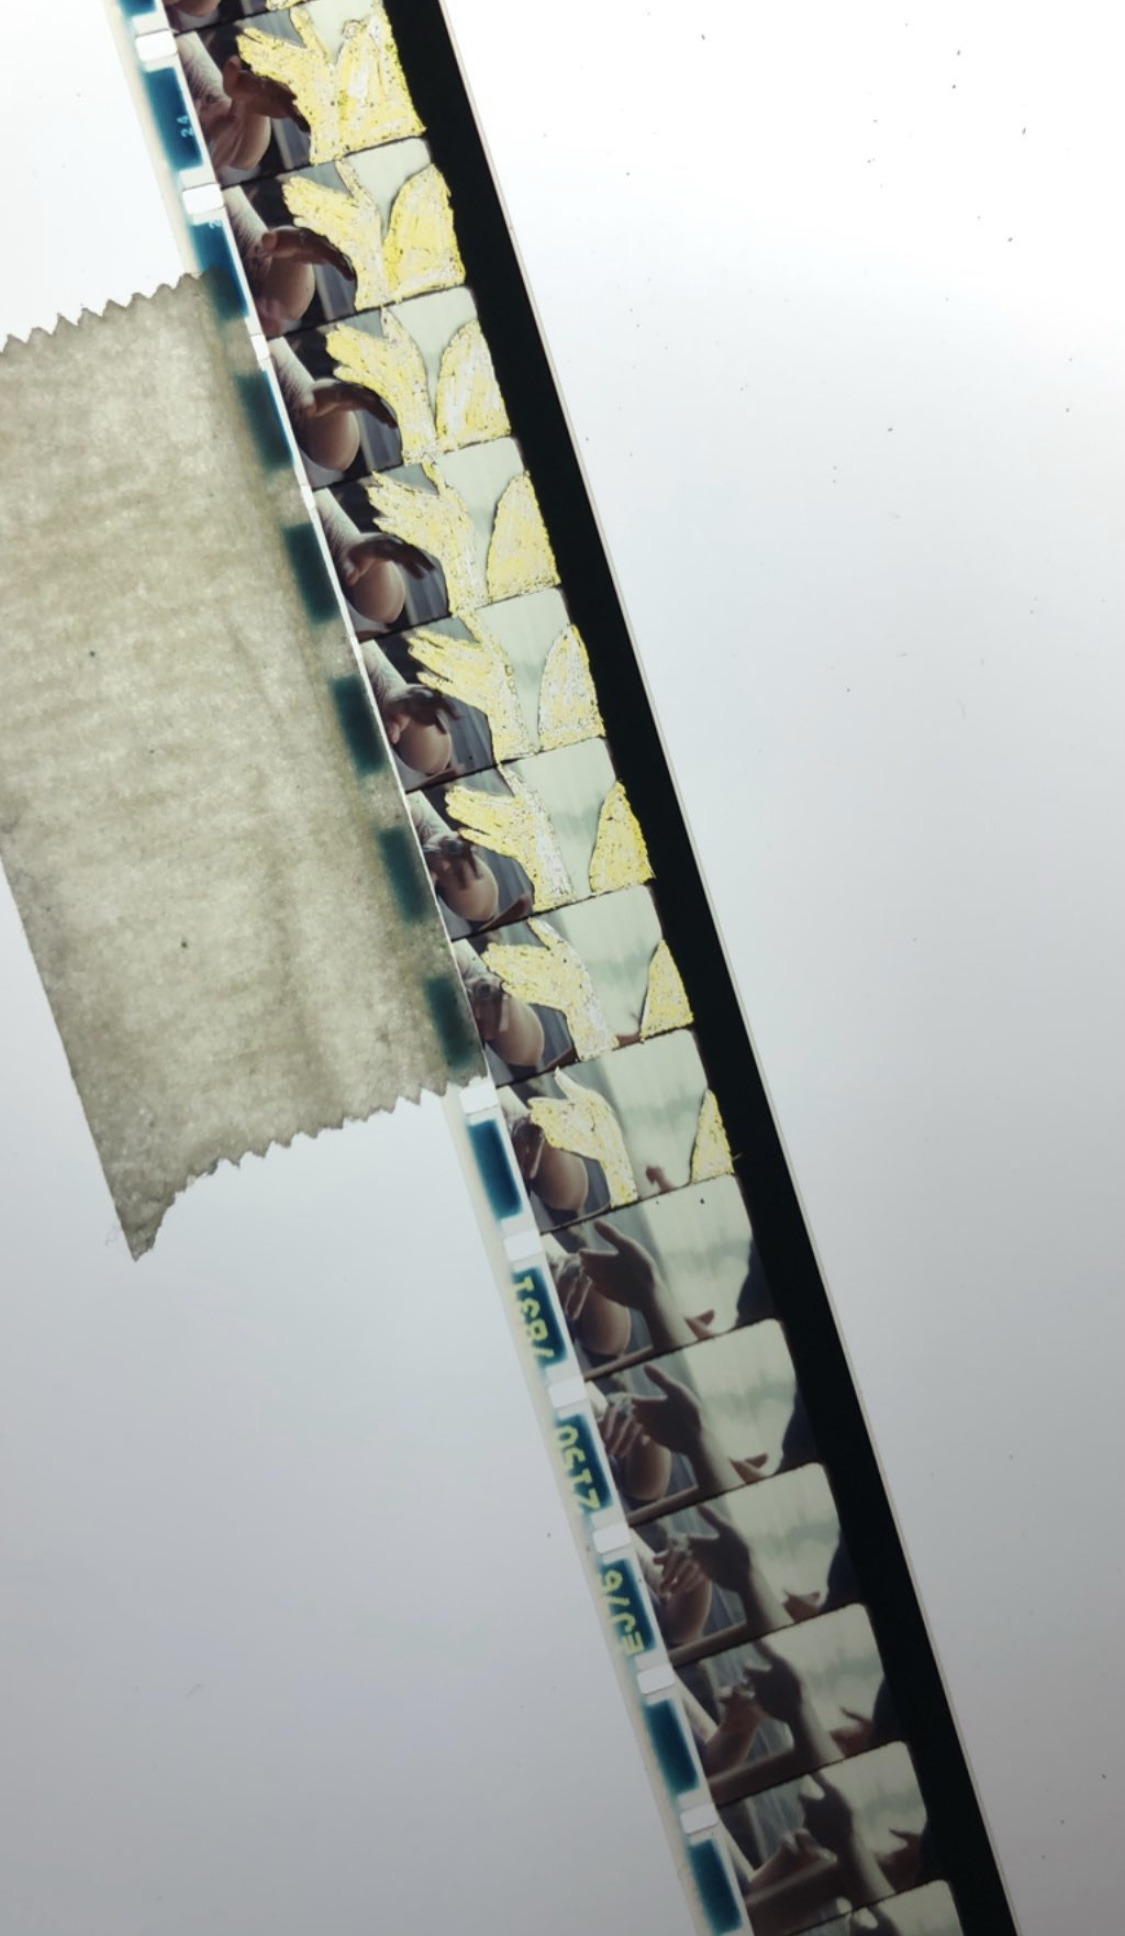
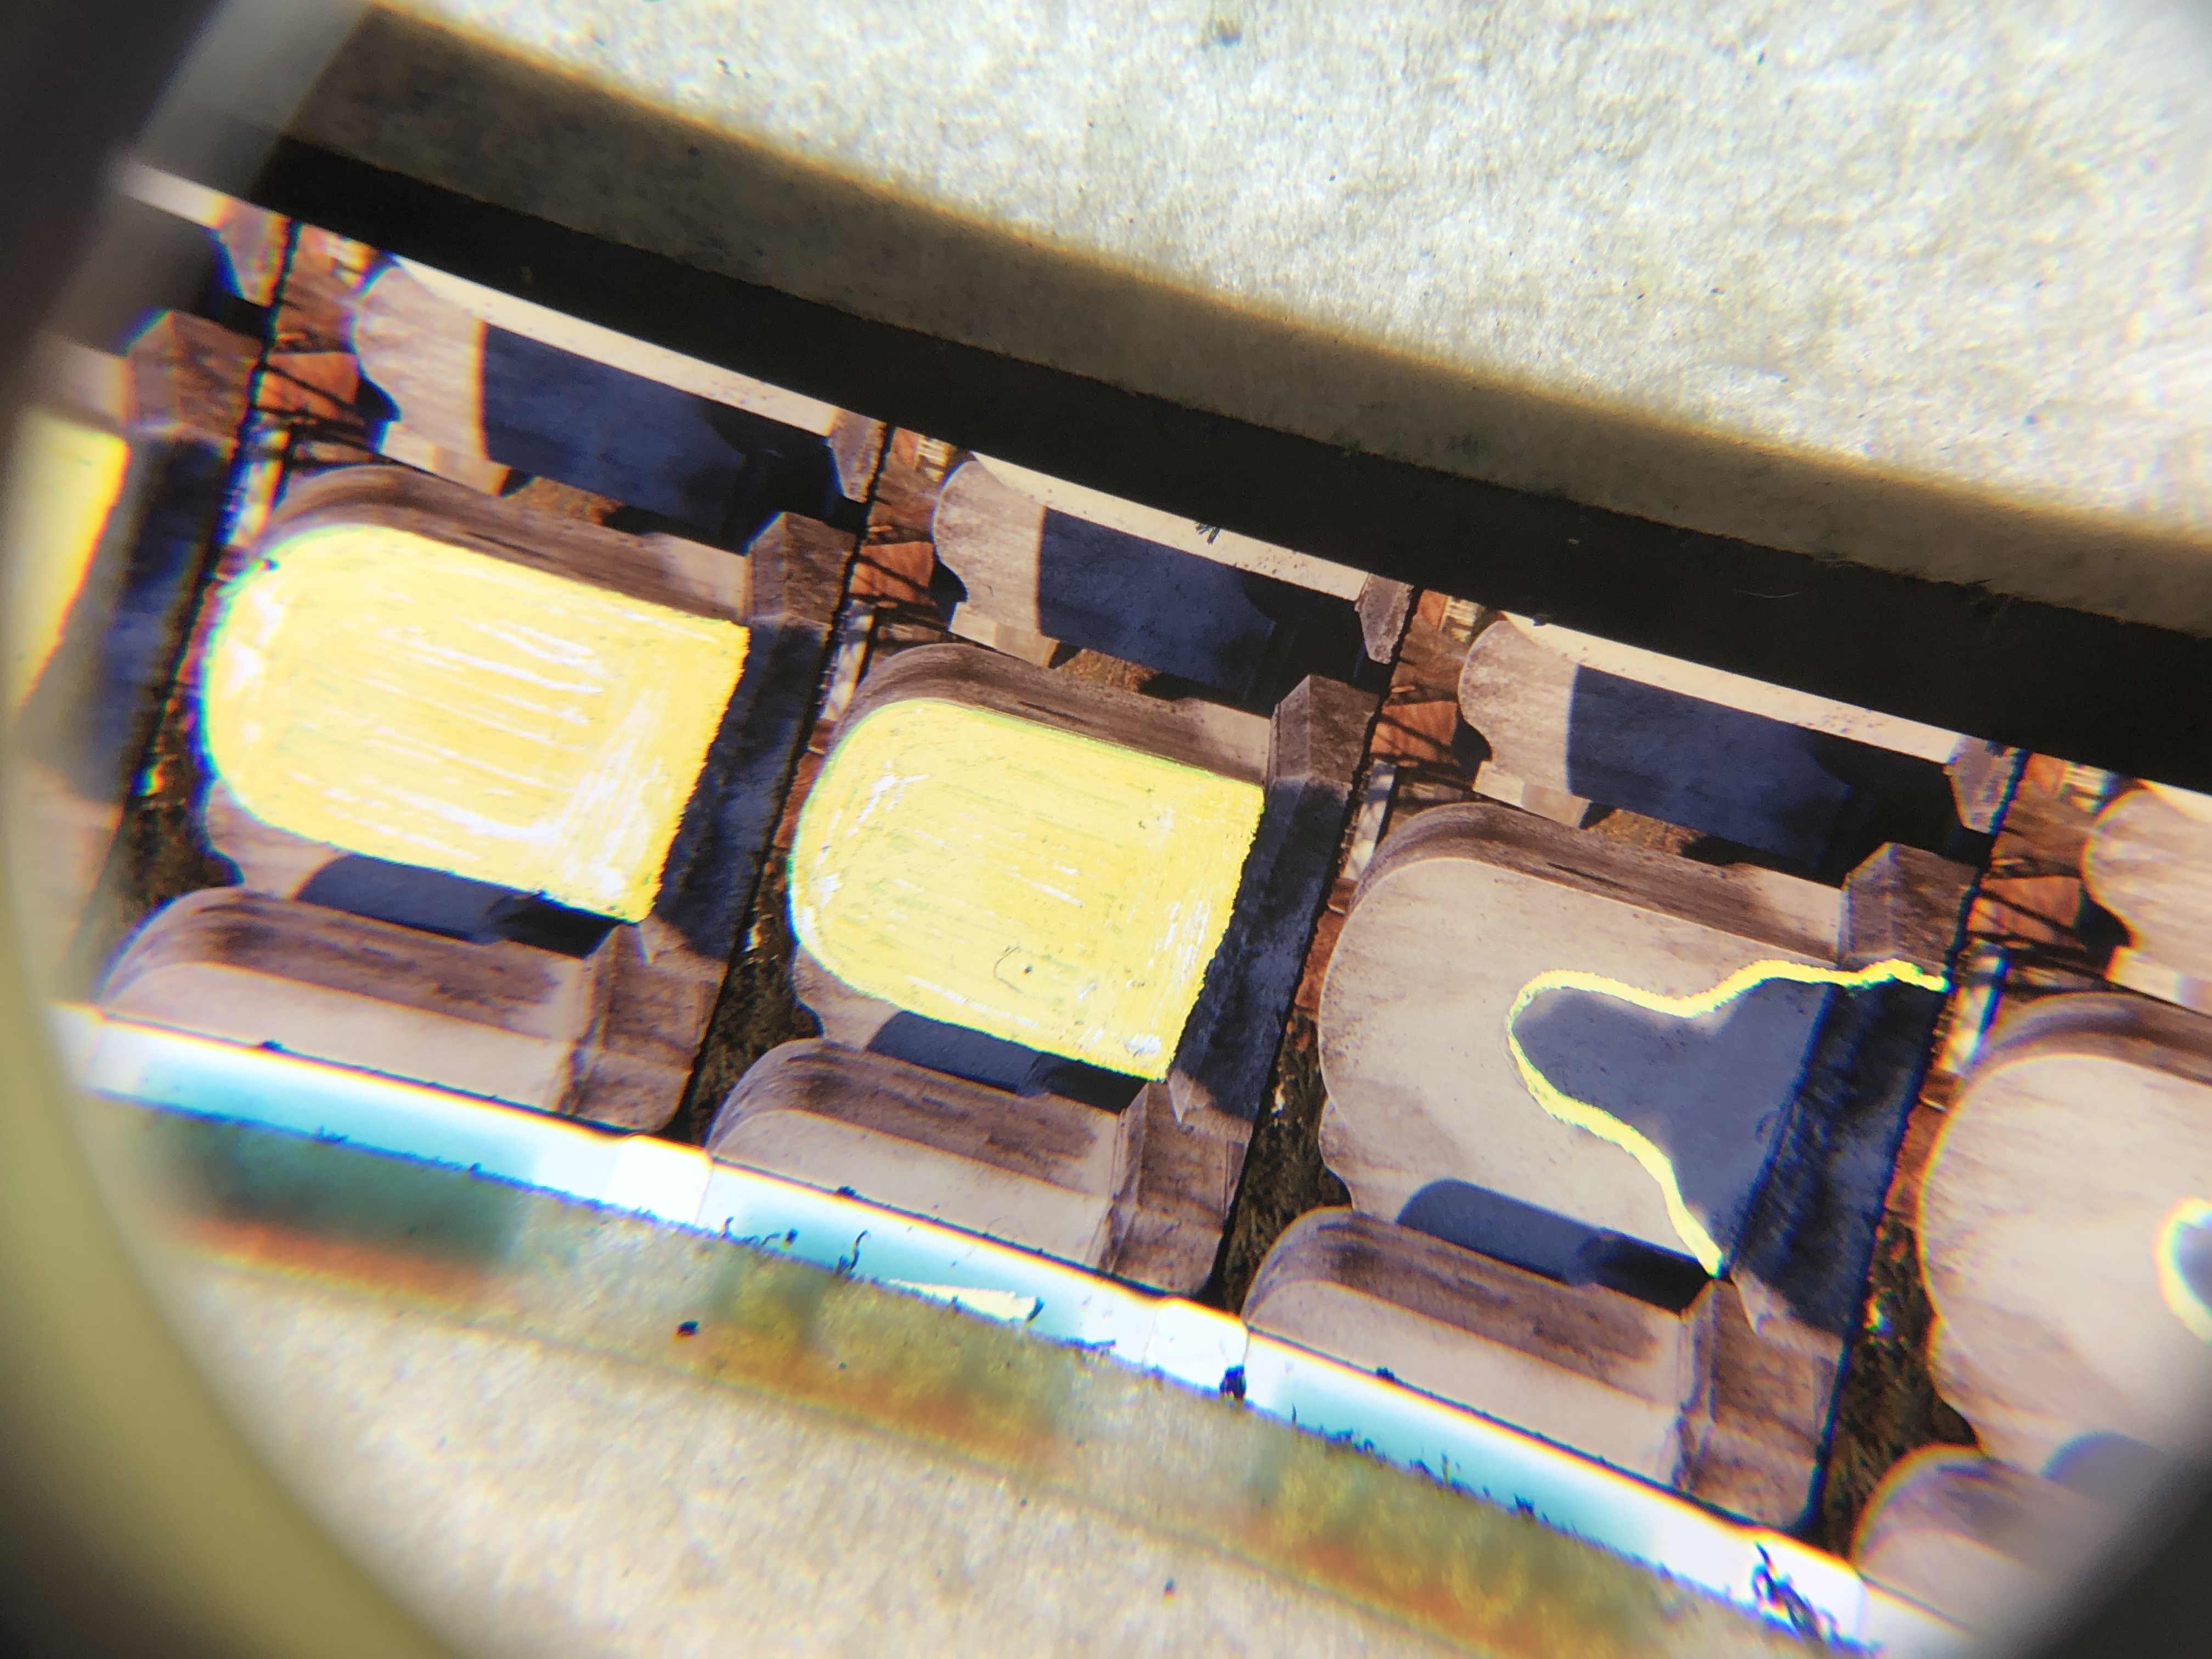
I use scratch art materials to scratch all of my film. I tried wood or caligraphy nibs and found they were too flimsy and lacked bite, I needed to replace or adjust them all the time. Scratch art tips are a happy medium of sturdy but not too sharp like razors that could damage the film base. Something important about making sure the quality of your lines is what you want it to be: I bought a diamond nail file (aka, a metal one) and filed down the tip of my scratch tool to exactly the angle, width and sharpness I wanted. I highly recommend this!! It will alow you way more control over your strokes.
I shoved my scratch art nib into my plastic caligraphy pen and personally wrapped it a few times in gaffers tape to protect my little fingers. It helps. Something else not on here that may help you - a magnifying glass, if you, like me, want to nitpick your tiny 16mm frames as you draw on them.
I have film rewinds attached to my desk on either side of my light table, and it gives me more mobility, but you don’t need these if you can’t afford them!! Rest your reels on the table or within your canister. It’ll be fine. Wind it by hand. You can either wind it on a projector or they’ll wind it if you send it off for scans later.
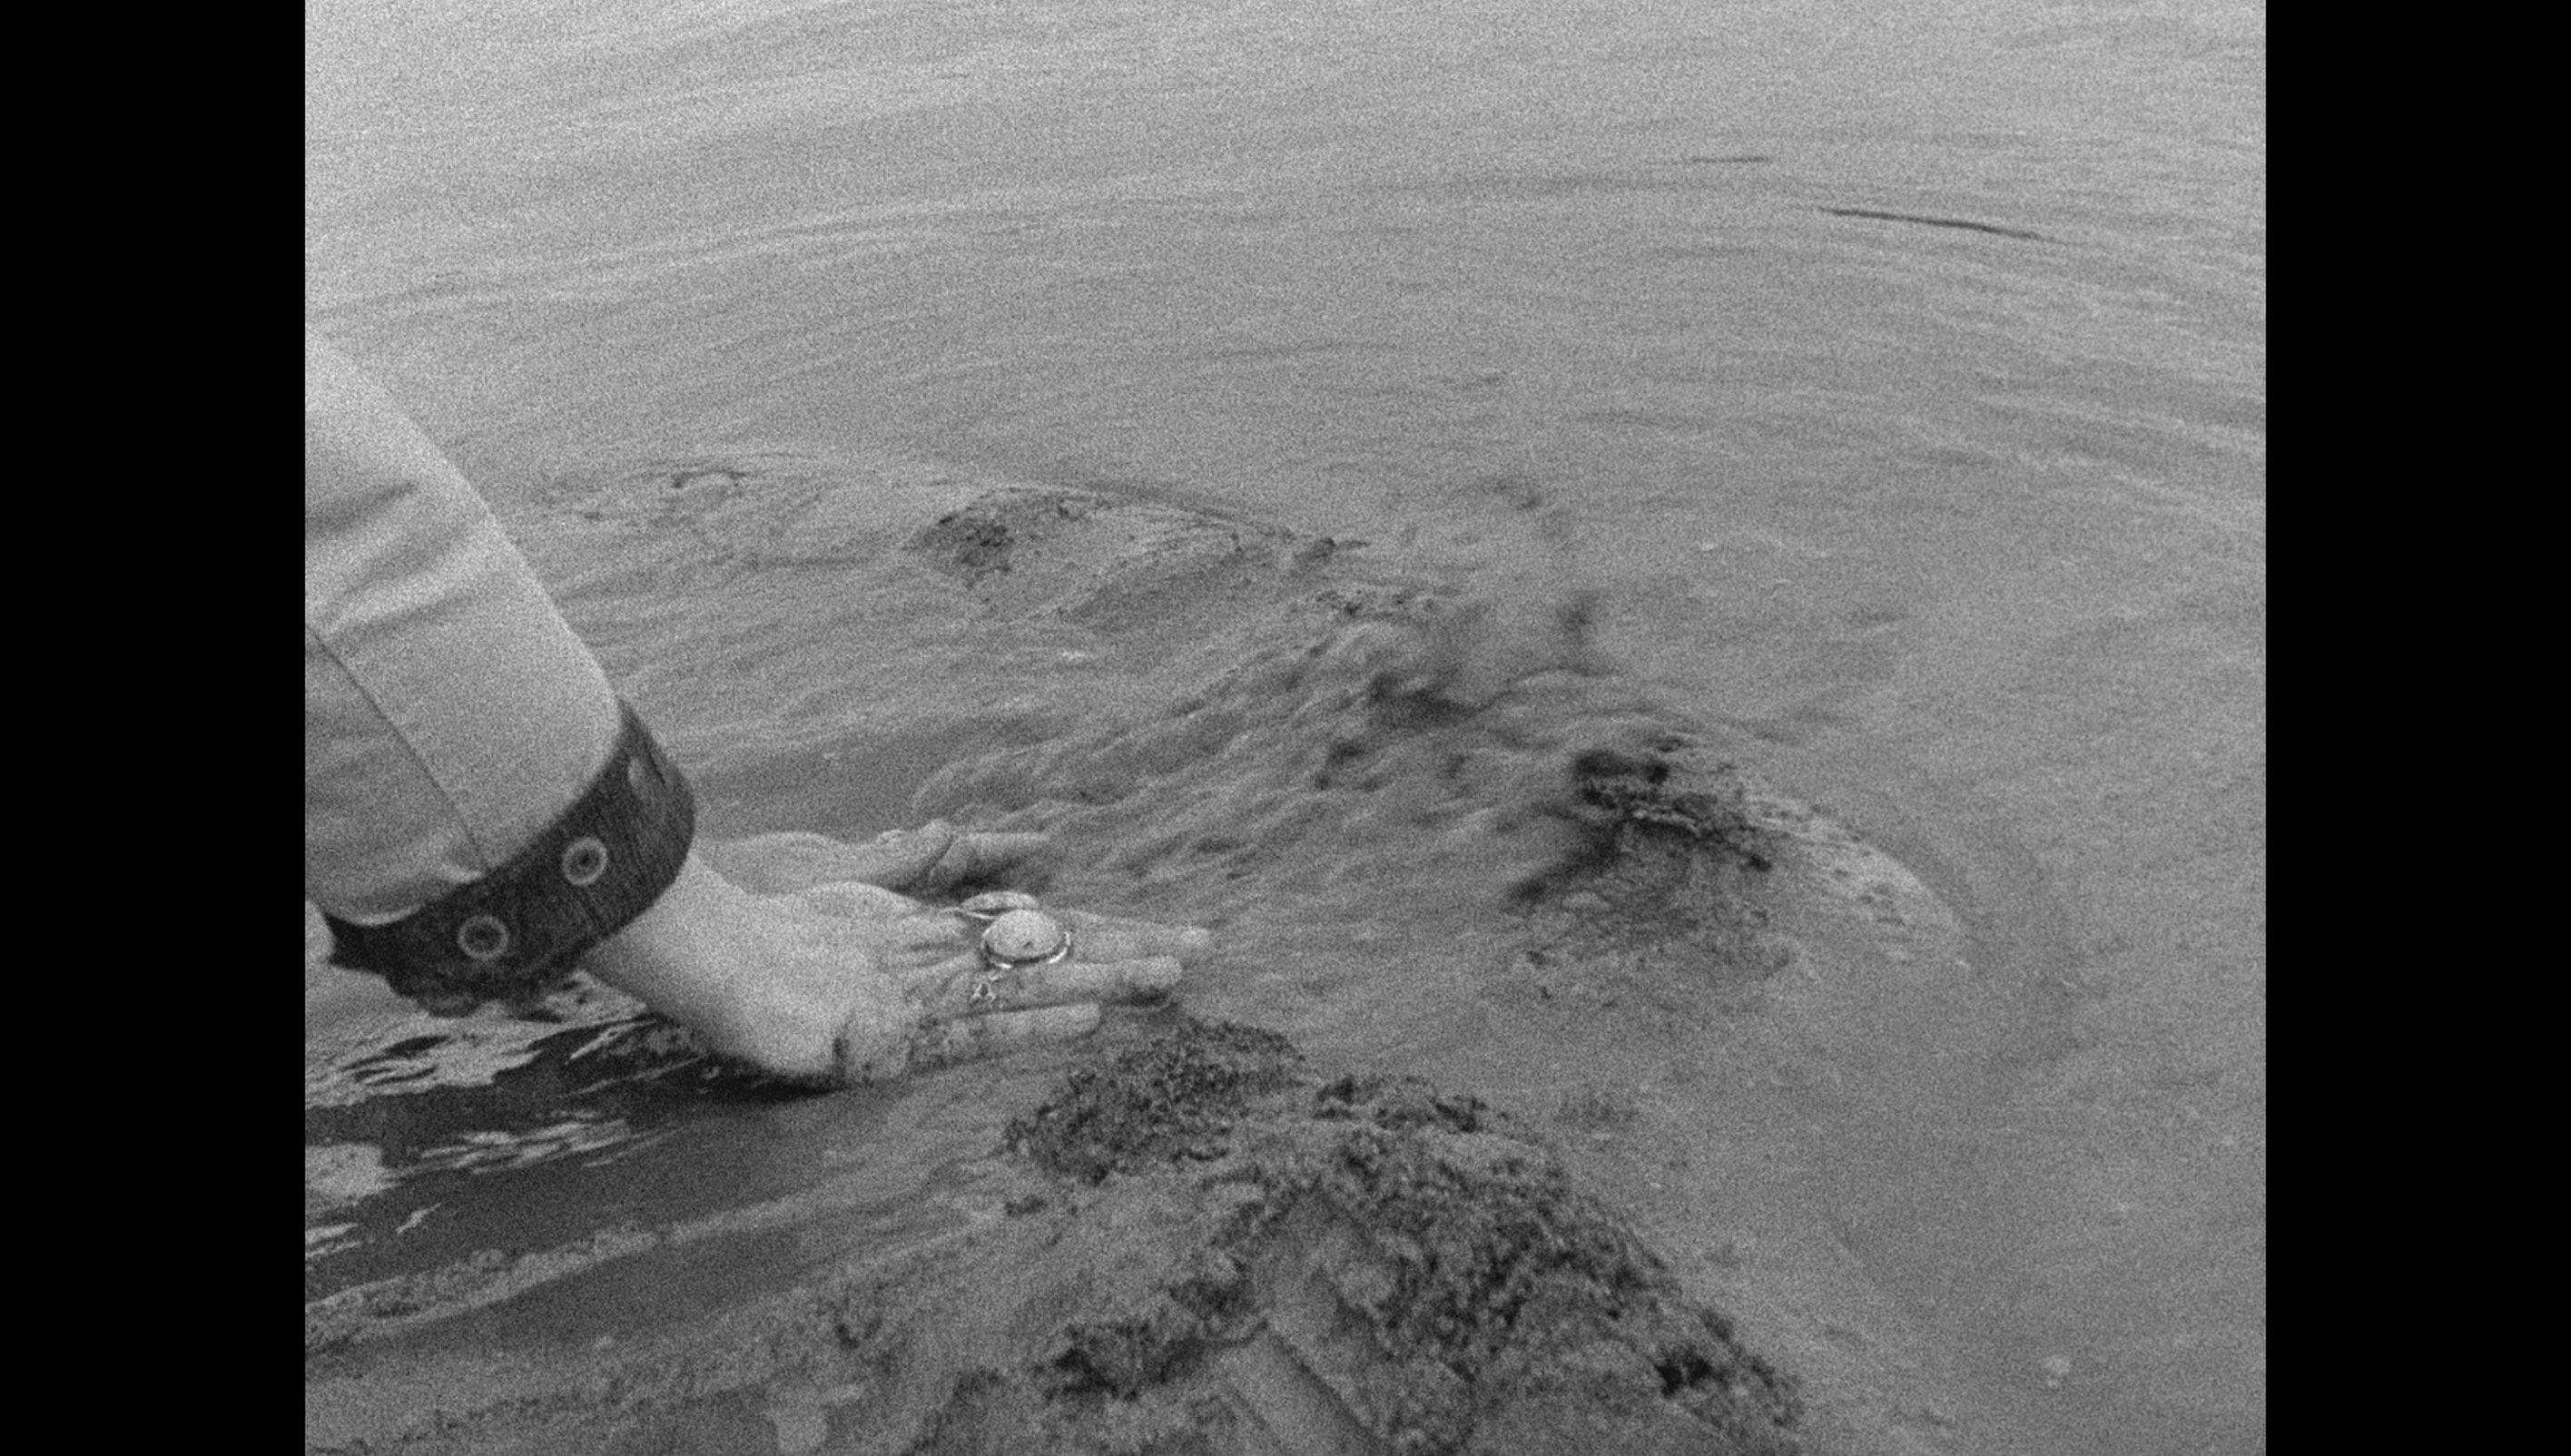
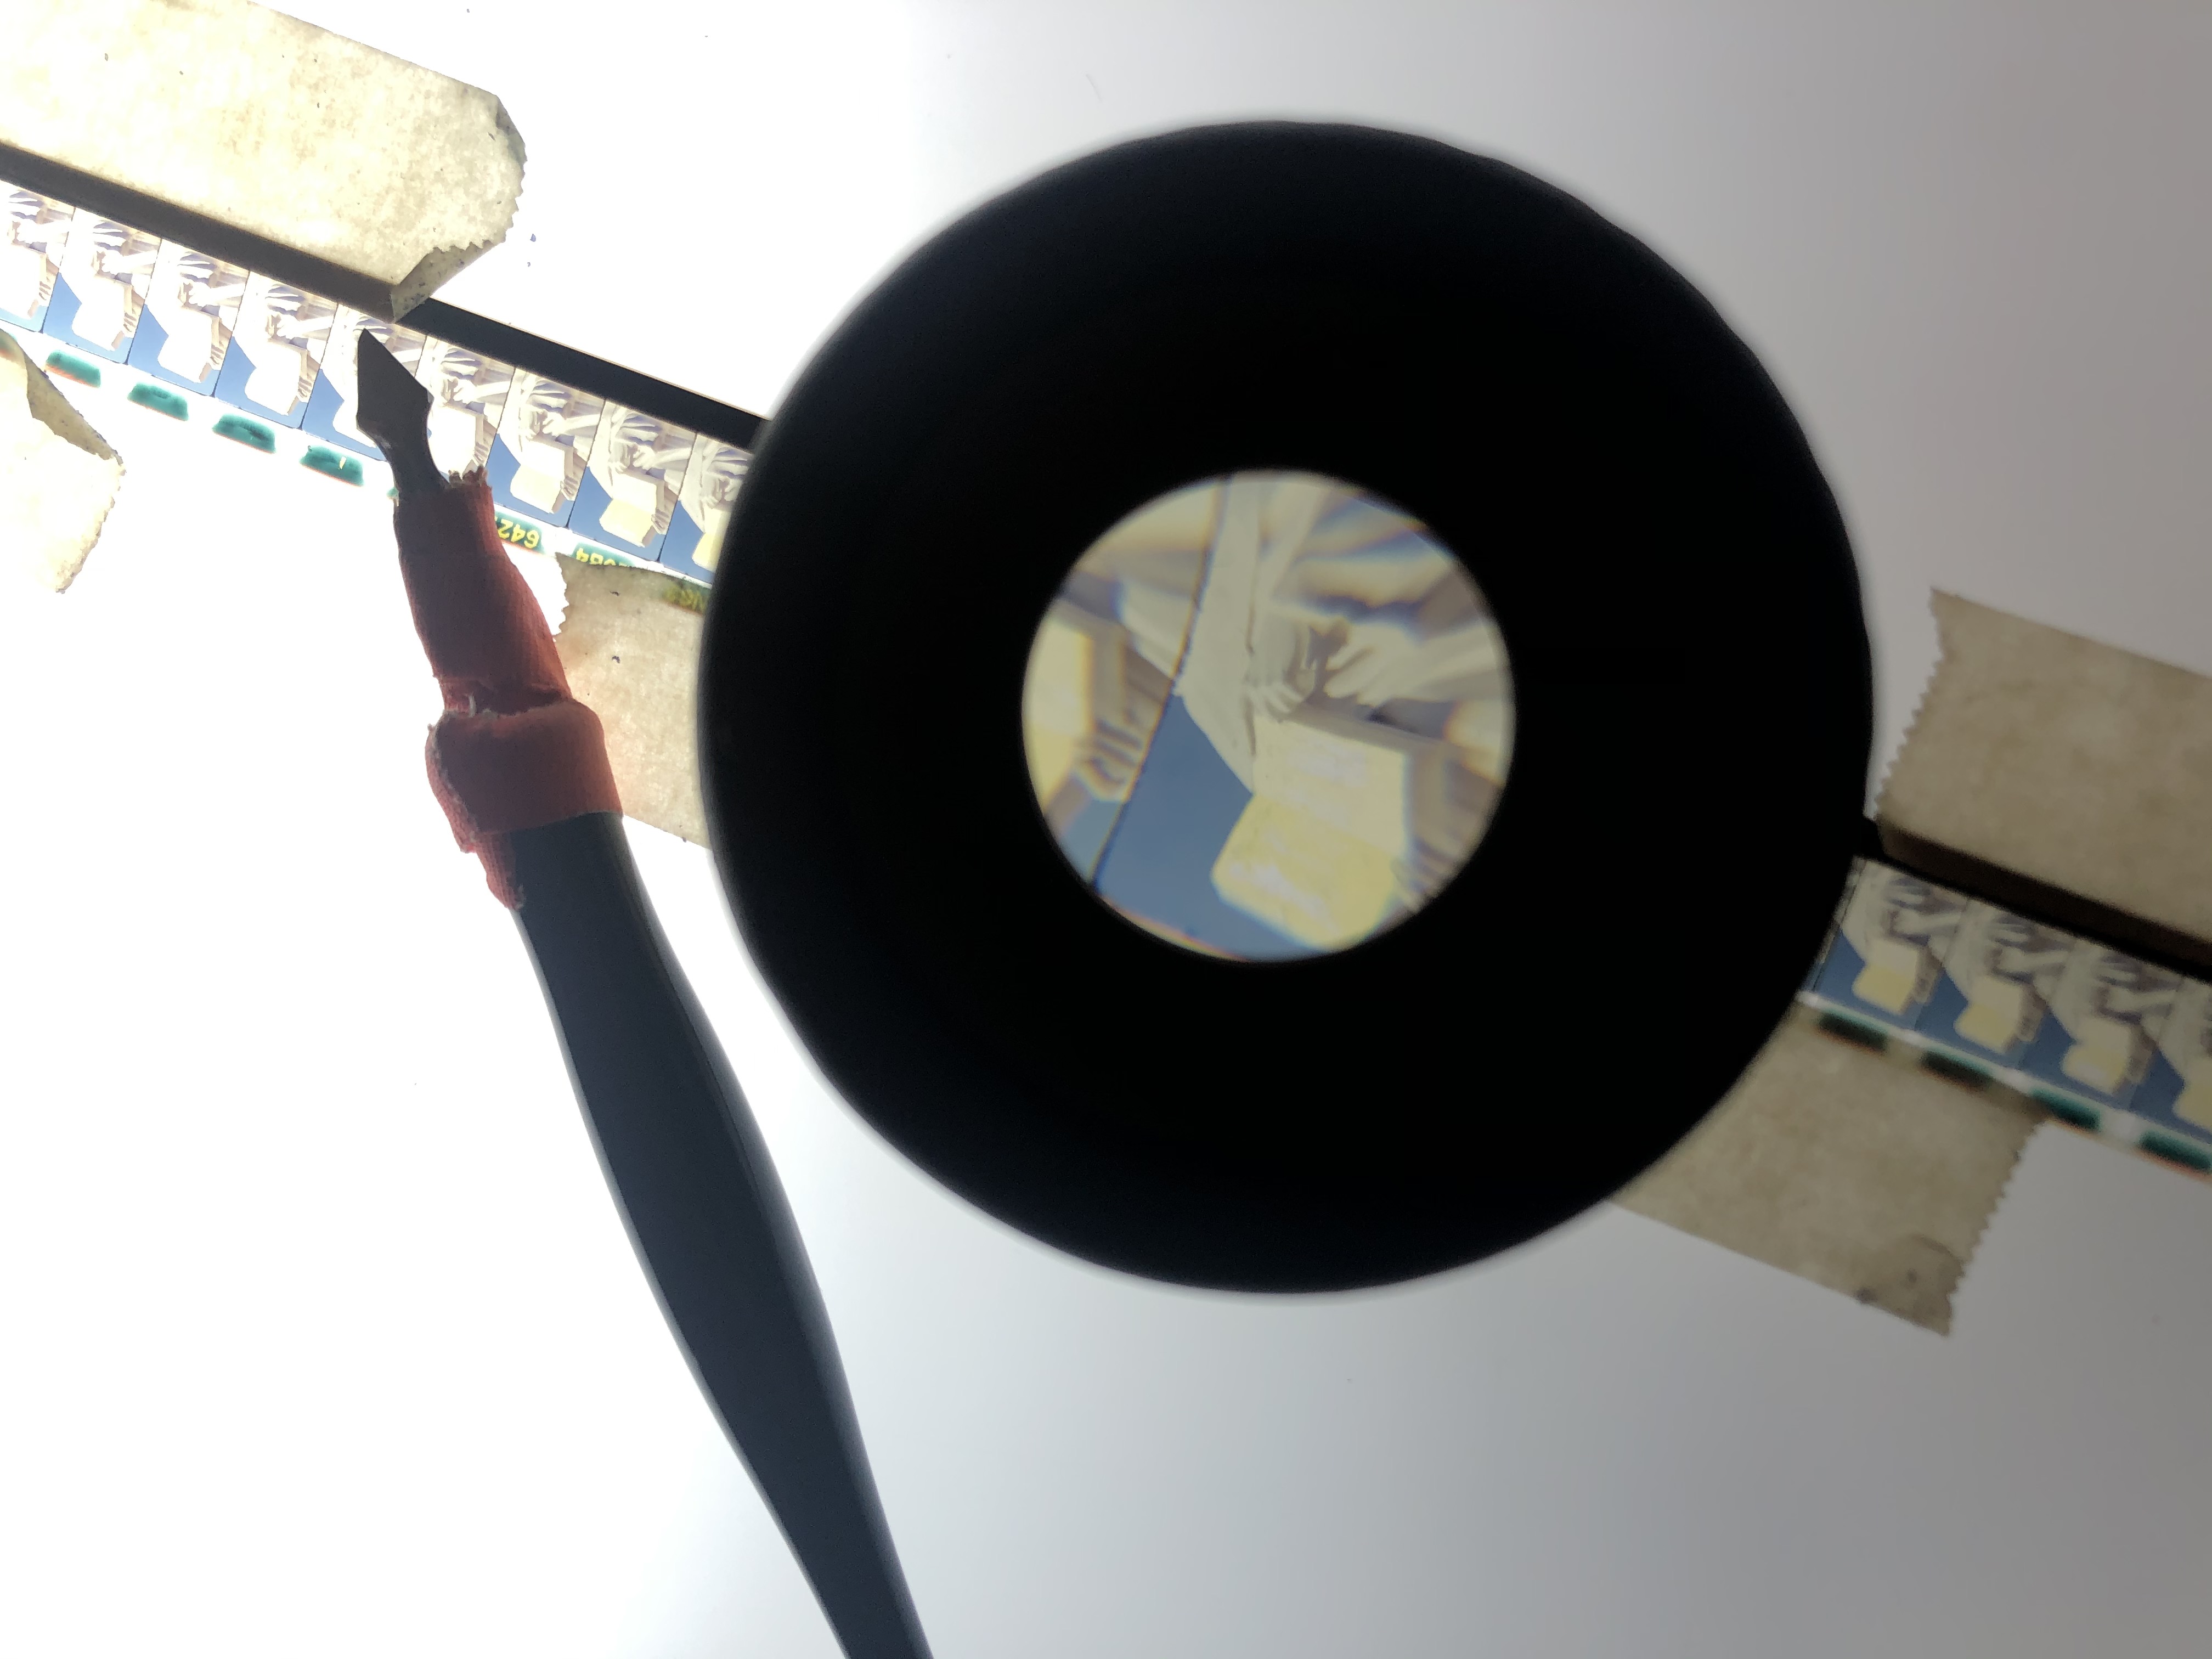
There are two sides to your film strip and the one you want is the one with the emulsion, as those chemicals and dyes suspended in silver halide have frozen your image to the polyester base and that is what can be removed. Polyester = shiny side, emulsion = cloudy side, or whichever side your tongue sticks to.
Set your film reel or core to one side of your light table and tape the starting point of what you’ll be scratching to it, paying attention to only tape the side areas you don’t need access to. I like to wear my cotton gloves so that emulsion bits dont flake all over me, but you dont have to. Have a glasses cleaning cloth nearby to wipe the emulsion you remove off of your film and the surrounding table, and the air blower to blow it away. You can handle your film with your fingers, it’ll be okay! Cotton gloves are great if you’re uptight like me but maybe you aren’t and that sounds great.
I work through scratching in small increments. I tape down my section to scratch and go carefully frame by frame. On a good day I’ll get three seconds done, depending on the intricacy of my shot. This takes a LONG time!! Be aware. Scratching for Other Methods took me months. It’s really painstaking and also really attentive. If it’s right for you you’ll love it. If not theres other ways.
I like to have a hole punch around for fun, a splicer to cut and organize my clips when that’s a thing I do, but I often don’t! You don’t need a whole editing room to do this. You can keep it really simple. Scratch your work, send it out for scans, or run it through a projector and tape it on any camera. Send me what you make. Take frequent breaks, stand up, stretch, stare at something 20 feet away for a minute. Wear a wrist brace if you do it a lot. I have a little standing desk attachment on top of my regular desk that really helps my posture and back. It’s a little table for going over your lap in bed but the height and tilt adjusts, it has clips to hold my light table, it’s sturdy. I really recommend this so that your work is eye level when you’re sitting down. Make sure you’re in a good chair. Be nice to yourself. You’re going to make something great.
︎︎︎Tools for Safer Film Processing︎︎︎

An actual tutorial for processing film may be forthcoming, but this is largely a guide to necessary materials to keep yourself safe and un-poisoned when handling photochemistry or working in a home darkroom. I work on color reversal, which is extremely toxic. B&W is less so, so these tips may be a little extreme for you if that’s your main medium, but I always recommend not coming into contact with any unnecessary chemicals! It’s bad for you. Nothing is worth making yourself sick! Film processing is so fun that it can be tempting to cut corners so that it’s less work-intensive. Always keep in mind that the only you that can make work is a healthy you. Here are some materials that I think are total necessities for me when I’m processing film.
Always always always cover exposed skin when processing and wear a good respirator. Always and for all types of chemistry, wear protective eyewear. When wearing a respirator, be sure it is a respirator specifically for chemical odors exposure and not for physical particulates. Physical particulates aren’t your problem here. Ventillate as well as you can. I process all of my film in my “laundry” sink in my basement, which has a door to the back porch, and whenever possible I keep it open. It’s a large space, and I run a fan.
I like elbow-length reusable rubber dishwashing gloves paired with a long-sleeve smock. This will also protect your clothes. I know people who wear zip-on coveralls, very cute! Just dont wear clothes you would usually wear elsewhere. Color reversal chemistry will bleach fabric, and you dont want any chemistry on your clothes as you go about your life.
USE A SINK THAT IS NOT FOR FOOD OR YOUR BODY! A basement laundry sink or garage is great, I’ve used a water heater and a drain before. Do not mix photo processing and showering or eating food. Use a sink in somebody else’s garabe or a slop sink in a studio if you dont have a place at home!
Have appropriate chemicals storage, as blix in particular is best kept in chemical-safe containers. Glass is okay too. Stick to materials you know it can’t sink into or burn through. Datatainers are cheap and really useful. Have a funnel on hand to pour your chemistry in and out. Use a thermometer to keep track of your water temperature if you’re processing at an elevated temp. To heat my chemicals, I plug the sink and run hot water into it with my chemical bottles sealed in the basin, and wait for them to heat up. Usually it takes 2 times. Temperature is super important in how your image develops.
Be careful! Plan ahead and take your time. Don’t rush and spill things. It can be really stressful your first few times, process some test reels. Send me what you make. You’re going to do great.